Let’s talk Boho Indigo. And let’s gloss over the fact that I completely overlooked this fantastic Product Medley when it launched last June and only just got round to using it a few weeks before it retires.
I
ran a Zoom class with the refill kit on Saturday and everyone was in
agreement; that these are some of the most gorgeous papers Stampin’
Up!® has ever produced.
Before we get to the projects I must warn you now that this is on the retiring list and only available while supplies last.
The
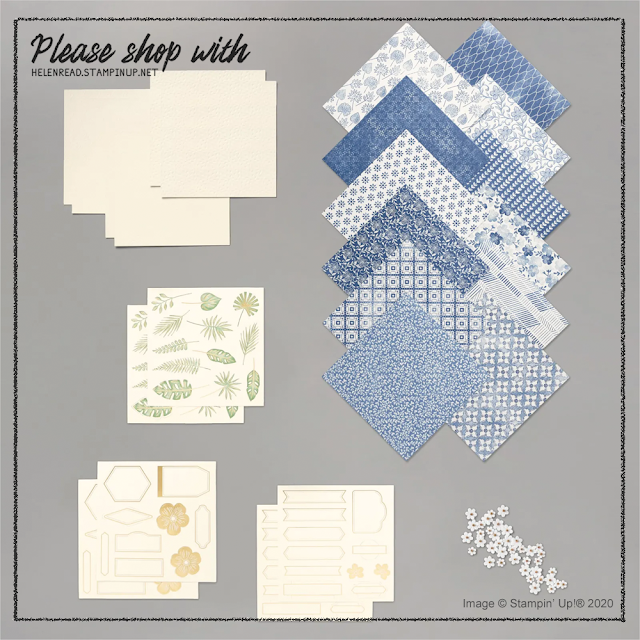
Boho Indigo Product Medley (pictured above) is reduced to £39, for which you receive
stamps, dies, ribbons, papers, label/image sheets and embellishments.
The Boho Indigo Product Medley Refill Kit (pictured above) remains at its original price of £21, which is still excellent value for just the papers, label/image sheets and embellishments... but when you can get the stamps and dies for an extra £18, well... why wouldn’t you?
Everyone in the class received half a refill kit plus the consumables to make their projects, which was a challenging list of four cards plus some 3D items. I’ll just show you the cards today, otherwise the blog post will go on forever! Please come back Thursday for the 3D items.
First up are these two lovely cards using the embossed sheets which come in the kit. From a demonstrator point of view, I loved that these were embossed as it saved me having to do it when packing all those kits! And from a crafter’s point of view, they just look really lovely as a backdrop to the green and gold elements.
What I love about this kit is that the Designer Series Papers are all Misty Moonlight and Very Vanilla, but the elements which come in the pack are Garden Green and gold, providing a beautiful contrast.
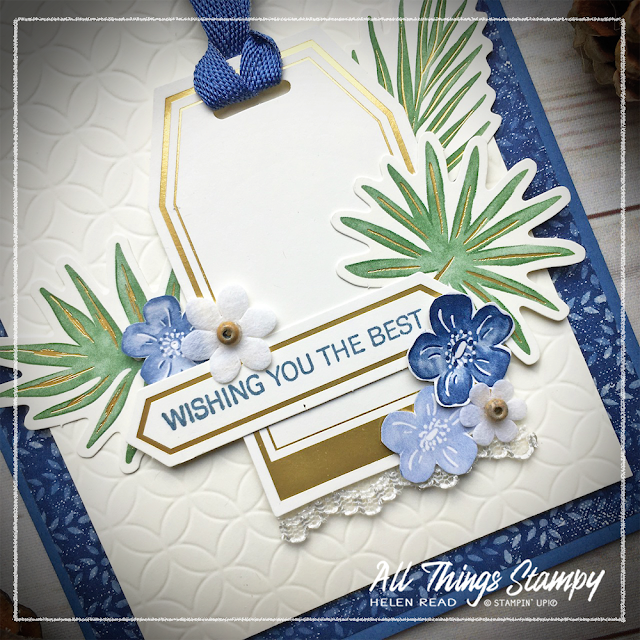
This card uses one of my favourite designs of paper, with a cluster of elements surrounding the stamped label. I stamped mine with Sweet Strawberry, which happily is carrying over into the new Annual Catalogue in May.
As you don’t get ribbon in the refill kit, I used Very Vanilla Scalloped Lace Trim, which is also carrying over. The gold flower and leaves are pop-out elements, while the small white paper flower is part of the kit and the blue flower is fussy-cut from Designer Series Paper.
This card also uses one of my favourite designs of paper – in fact I’d go as far as to say it is my favourite from the pack so even now I’m questioning the wisdom of covering so much of it up.
I’ve used a tag AND a label on this card, partly because I was just not getting through them all – and remember this was from only half a pack! You get two of every element sheet in the full refill kit.
Again, this is decorated with pop-out leaves and a selection of flowers, some little paper embellishment flowers and some cut from the Designer Series Paper. This time I used Misty Moonlight In Color Ribbon which sadly and inexplicably is retiring soon, along with its sister ribbons from that range.
We made two more cards with a Thick Very Vanilla cardstock base and let the Designer Series Paper do all the heavy lifting here.
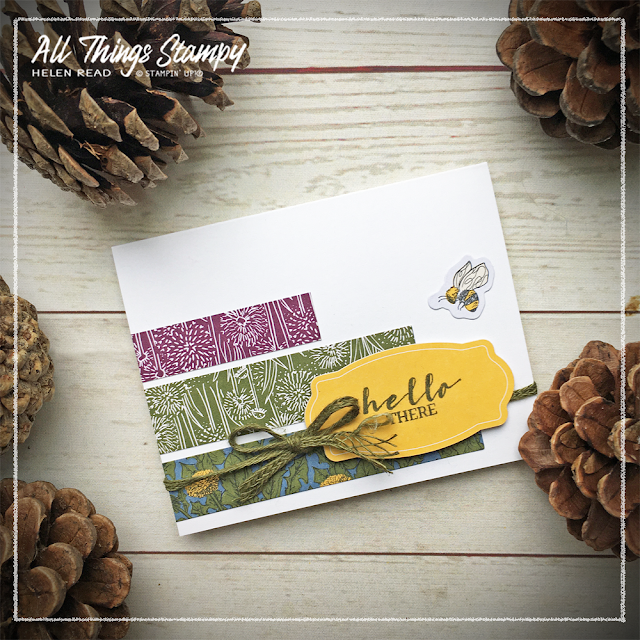
Aha, my favourite design gets a bit more of a showing here in this patchwork-style card. To create this, I cut a piece of Misty Moonlight cardstock about 1cm smaller than the card front. To create the ‘patchwork’ pieces, I began with the greeting label and used this to inform the width of the two panels above and below. I then measured the remaining space and cut a strip just a little narrower for the left. I tell you this rather than actual measurements as it should help you to recreate a similar design for any size cardstock. I’m not a big measurements person; I prefer to work by eye. I also appreciate that card sizes vary around the world... by which I mean literally everyone uses A4 except the USA!

This is a really simple and popular card design which adapts well to any Designer Series Paper. Again, a Misty Moonlight panel cut just smaller than the card front, then cut three equal strips of Designer Series Paper to fill. Ribbon around it before you stick it down, the label and flowers on top. Boom!
With my leftover supplies I quickly put together these three cards. One uses the three panels of Designer Series Paper on a portrait card, while the other two use the The Tailored Tag Punch (carrying over –phew!), which is ideal for using up any leftover scraps of Designer Series Paper.
‘Just a Note’ comes from the Simply Citrus Kit and the stamped feathers are from Tasteful Touches (carrying over).
I hope you love these projects and products as much as I do. On Thursday I will show you the box we created for the cards, plus a little pouch and hanging ornament.
If you are in the UK and would like to order this fabulous product medley, refill kit or indeed anything else, please
visit my store and, if you use the April host code TRPKSXWR, I’ll send you a thank you gift in May!
Does
your wish list come to more than £99? Please get in touch and I will
help you get more for your money and unlock discounts all year round.
Let’s talk Boho Indigo. And let’s gloss over the fact that I completely overlooked this fantastic Product Medley when it launched last June and only just got round to using it a few weeks before it retires.
I
ran a Zoom class with the refill kit on Saturday and everyone was in
agreement; that these are some of the most gorgeous papers Stampin’
Up!® has ever produced.
Before we get to the projects I must warn you now that this is on the retiring list and only available while supplies last.
The
Boho Indigo Product Medley (pictured above) is reduced to £39, for which you receive
stamps, dies, ribbons, papers, label/image sheets and embellishments.
The Boho Indigo Product Medley Refill Kit (pictured above) remains at its original price of £21, which is still excellent value for just the papers, label/image sheets and embellishments... but when you can get the stamps and dies for an extra £18, well... why wouldn’t you?
Everyone in the class received half a refill kit plus the consumables to make their projects, which was a challenging list of four cards plus some 3D items. I’ll just show you the cards today, otherwise the blog post will go on forever! Please come back Thursday for the 3D items.
First up are these two lovely cards using the embossed sheets which come in the kit. From a demonstrator point of view, I loved that these were embossed as it saved me having to do it when packing all those kits! And from a crafter’s point of view, they just look really lovely as a backdrop to the green and gold elements.
What I love about this kit is that the Designer Series Papers are all Misty Moonlight and Very Vanilla, but the elements which come in the pack are Garden Green and gold, providing a beautiful contrast.
This card uses one of my favourite designs of paper, with a cluster of elements surrounding the stamped label. I stamped mine with Sweet Strawberry, which happily is carrying over into the new Annual Catalogue in May.
As you don’t get ribbon in the refill kit, I used Very Vanilla Scalloped Lace Trim, which is also carrying over. The gold flower and leaves are pop-out elements, while the small white paper flower is part of the kit and the blue flower is fussy-cut from Designer Series Paper.
This card also uses one of my favourite designs of paper – in fact I’d go as far as to say it is my favourite from the pack so even now I’m questioning the wisdom of covering so much of it up.
I’ve used a tag AND a label on this card, partly because I was just not getting through them all – and remember this was from only half a pack! You get two of every element sheet in the full refill kit.
Again, this is decorated with pop-out leaves and a selection of flowers, some little paper embellishment flowers and some cut from the Designer Series Paper. This time I used Misty Moonlight In Color Ribbon which sadly and inexplicably is retiring soon, along with its sister ribbons from that range.
We made two more cards with a Thick Very Vanilla cardstock base and let the Designer Series Paper do all the heavy lifting here.
Aha, my favourite design gets a bit more of a showing here in this patchwork-style card. To create this, I cut a piece of Misty Moonlight cardstock about 1cm smaller than the card front. To create the ‘patchwork’ pieces, I began with the greeting label and used this to inform the width of the two panels above and below. I then measured the remaining space and cut a strip just a little narrower for the left. I tell you this rather than actual measurements as it should help you to recreate a similar design for any size cardstock. I’m not a big measurements person; I prefer to work by eye. I also appreciate that card sizes vary around the world... by which I mean literally everyone uses A4 except the USA!

This is a really simple and popular card design which adapts well to any Designer Series Paper. Again, a Misty Moonlight panel cut just smaller than the card front, then cut three equal strips of Designer Series Paper to fill. Ribbon around it before you stick it down, the label and flowers on top. Boom!
With my leftover supplies I quickly put together these three cards. One uses the three panels of Designer Series Paper on a portrait card, while the other two use the The Tailored Tag Punch (carrying over –phew!), which is ideal for using up any leftover scraps of Designer Series Paper.
‘Just a Note’ comes from the Simply Citrus Kit and the stamped feathers are from Tasteful Touches (carrying over).
I hope you love these projects and products as much as I do. On Thursday I will show you the box we created for the cards, plus a little pouch and hanging ornament.
If you are in the UK and would like to order this fabulous product medley, refill kit or indeed anything else, please
visit my store and, if you use the April host code TRPKSXWR, I’ll send you a thank you gift in May!
Does
your wish list come to more than £99? Please get in touch and I will
help you get more for your money and unlock discounts all year round.


