Sunday, 28 February 2021

Share It Sunday Blog hop - Hot Dog!

Hot Dog Stampin Up card ideas
Shop the project here

How cute is this stamp set? Answer: very. It’s called Hot Dog and is a fun way for me to take part in this Share It Sunday blog hop, with demonstrators from around the world. I hope you enjoy taking a trip through some great blogs and seeing some fabulous projects. 

Stampin up blog hop
 

But before we begin, I must remind you that today is the final day of Sale-a-Bration, so if you want to take advantage of any of the SAB freebies, please act extremely fast. 

You can shop online here

You can join my team here

The paper I’ve used on these first two projects is called Berry Blessings and is a Sale-a-Bration item so available for just a few more hours!

Thankfully, there is no desperate rush to get your hands on Hot Dog, as this cute stamp set is part of the January-June Mini Catalogue collection. It features three different Dachshunds plus lots of fun accessories and greetings.  However, I decided to keep things simple with some colouring using my Stampin’ Blends and this vibrant Designer Series Paper. 

This DSP features the little-used Pacific Point, and not before time. Why do we neglect Pacific Point so much? It’s a really lovely blue and I remember greeting its arrival with much excitement. 

To stop the dog ‘floating’ in mid air, I stamped onto the circle element using Woven Heirlooms. I love this grungy image, with a bit of pattern showing through, giving it the look of a faced old carpet. The ‘hi’ adds a final touch and makes it ideal to send to a Dachshund-owning friend for no particular reason at all. 

Hot Dog Stampin Up card ideas
Shop the project here


Here is another card I made using this gorgeous Designer Series Paper and Hot Dog. The greeting is very silly, but seriously, not as silly as the next one which for some reason keeps making me chuckle to myself...
Hot Dog Stampin Up card ideas
Shop the project here

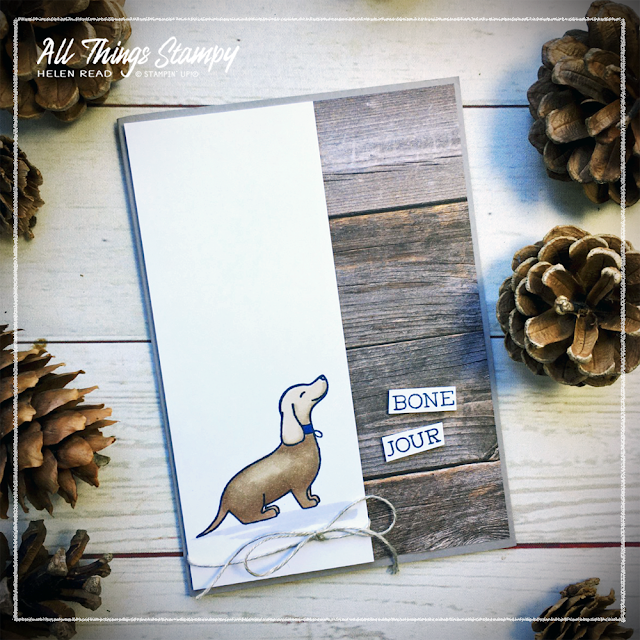
Bone-jour! 😂 I do love a terrible pun and this one is pretty terrible, all right! I’ve kept this design clean, simple and masculine, using the In Good Taste Designer Series Paper as my background. I really love that paper, especially the wood-effect sheets. 

As I say, my designs are pretty simple, but after two months of intense crafting for Sale-a-Bration, I felt like scaling things back a little. It’s also important to remember that not everybody has the time or resources for big fancy projects – and simple can be just as effective in many cases. 

Please now take a look at the creations made by other Stampin’ Up!® Demonstrators around the world for this Share It Sunday...


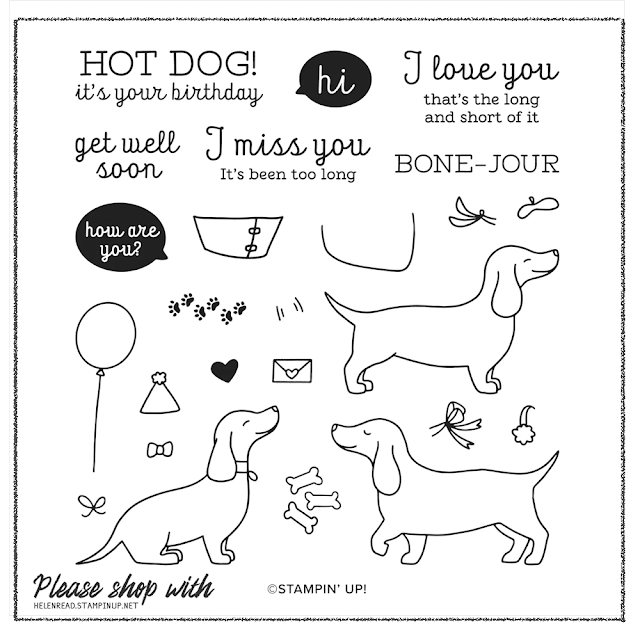
Hot Dog is a stamp set which offers a huge amount of potential for many different occasions, and is perfect for the dog-lover. Take a look at all of the stamps here:

Hot Dog Stampin Up card ideas

Hot Dog is available until the end of June, although bear in mind products will switch to ‘while supplies last’ towards the ened of this period. If you are in the UK and would like to order, please visit my store and, if you use the March host code HYEBNWP3, I’ll send you a thank you gift in April!


Does your wish list come to more than £99? Please get in touch and I will help you get more for your money and unlock discounts all year round.  


Read More »

Hot Dog Stampin Up card ideas
Shop the project here

How cute is this stamp set? Answer: very. It’s called Hot Dog and is a fun way for me to take part in this Share It Sunday blog hop, with demonstrators from around the world. I hope you enjoy taking a trip through some great blogs and seeing some fabulous projects. 

Stampin up blog hop
 

But before we begin, I must remind you that today is the final day of Sale-a-Bration, so if you want to take advantage of any of the SAB freebies, please act extremely fast. 

You can shop online here

You can join my team here

The paper I’ve used on these first two projects is called Berry Blessings and is a Sale-a-Bration item so available for just a few more hours!

Thankfully, there is no desperate rush to get your hands on Hot Dog, as this cute stamp set is part of the January-June Mini Catalogue collection. It features three different Dachshunds plus lots of fun accessories and greetings.  However, I decided to keep things simple with some colouring using my Stampin’ Blends and this vibrant Designer Series Paper. 

This DSP features the little-used Pacific Point, and not before time. Why do we neglect Pacific Point so much? It’s a really lovely blue and I remember greeting its arrival with much excitement. 

To stop the dog ‘floating’ in mid air, I stamped onto the circle element using Woven Heirlooms. I love this grungy image, with a bit of pattern showing through, giving it the look of a faced old carpet. The ‘hi’ adds a final touch and makes it ideal to send to a Dachshund-owning friend for no particular reason at all. 

Hot Dog Stampin Up card ideas
Shop the project here


Here is another card I made using this gorgeous Designer Series Paper and Hot Dog. The greeting is very silly, but seriously, not as silly as the next one which for some reason keeps making me chuckle to myself...

Hot Dog Stampin Up card ideas
Shop the project here

Bone-jour! 😂 I do love a terrible pun and this one is pretty terrible, all right! I’ve kept this design clean, simple and masculine, using the In Good Taste Designer Series Paper as my background. I really love that paper, especially the wood-effect sheets. 

As I say, my designs are pretty simple, but after two months of intense crafting for Sale-a-Bration, I felt like scaling things back a little. It’s also important to remember that not everybody has the time or resources for big fancy projects – and simple can be just as effective in many cases. 

Please now take a look at the creations made by other Stampin’ Up!® Demonstrators around the world for this Share It Sunday...


Hot Dog is a stamp set which offers a huge amount of potential for many different occasions, and is perfect for the dog-lover. Take a look at all of the stamps here:

Hot Dog Stampin Up card ideas

Hot Dog is available until the end of June, although bear in mind products will switch to ‘while supplies last’ towards the ened of this period. If you are in the UK and would like to order, please visit my store and, if you use the March host code HYEBNWP3, I’ll send you a thank you gift in April!


Does your wish list come to more than £99? Please get in touch and I will help you get more for your money and unlock discounts all year round.  


Thursday, 25 February 2021

Dandy Garden Suite: Garden Wishes or Dragonfly Garden - Part Two

Dandy Dragonfly Garden Wishes Stampin Up
 
Part two of my Dandy Garden Day projects features this little box of notecards. This set above shows the box and cards made using the Dragonfly Wishes bundle. 

Dandy Dragonfly Garden Wishes Stampin Up

However, once again I made samples using both the Garden Wishes and Dragonfly Garden bundles, and again guests could use the Designer Series Paper to add their dragonflies or bees, if their stamp set didn't feature the one they wanted. As you can see from the image above, I cut out the bee from Dandy Garden Designer Series Paper, even though there is one featured in the stamp set. 

We used Dandy Garden DSP to cover the box, just applying paper to the top, front and back. 
 
Wet adhesive such as Tombow is best when covering these Mini Paper Pumpkin Boxes as it gives you that all-important “wiggle room”. If you apply the DSP all while the box is flat, the paper will stretch so assemble the box first then apply adhesive to the top only, leaving DSP hanging over the front to cover the flap with about 5mm (3/16”) on each side and the bottom edge. 
 
Only when the top is stuck should you add adhesive to the front and back panels, then carefully smooth the paper around to adhere.

 
Dandy Dragonfly Garden Wishes Stampin Up

The first of our cards to go inside was arguably the most complex, although even this is not too fiddly. We stamped our tallest image on a white panel, popped this up onto the note card, showing a strip of co-ordinating DSP to the right. Then it's finished off with a dragonfly (stamped or cut from the paper), a greeting and a ladybird. 
 

The Ladybug Trinkets are hollow so the best way to stick them down is using Mini Glue Dots. Don’t have any Mini Glue Dots? (Why not, they’re amazing!) You could use a small piece of double-sided tape, but it will be fiddly!

Dandy Dragonfly Garden Wishes Stampin Up

This Designer Series Paper is too beautiful to hide so these cards show it off by making it a feature of both the cards and the envelopes.

Covering the envelope flap is really easy but be warned: 6x6" DSP is only wide enough to cover the flaps of a notecard envelope, not our standard C6. 

 Simply apply adhesive all over the envelope flap then, making sure you have the pattern the right way up (if that matters with your chosen design), stick the full piece of DSP to the flap, butting it up neatly to the fold. Then turn it over and cut it out freehand, using scissors. 

Dandy Dragonfly Garden Wishes Stampin Up

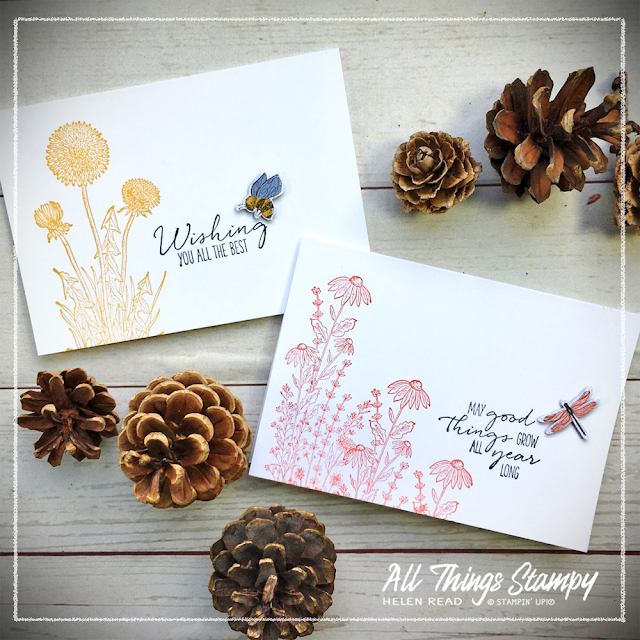
These cards are scaled right back but are no less striking for their simplicity. The card on the left features dandelions stamped onto separate cardstock and cut out with the dies. ‘Hello’ looked a bit lost on its own so I stamped it three times. 

The card on the right has its flowers stamped directly onto the notecard, with a popped up dragonfly cut out from the DSP. 

Dandy Dragonfly Garden Wishes Stampin Up
 

Even simpler are these two note cards, with no colouring, just the image stamped in a colour directly onto the card. In both cases, the inset is cut out from the DSP. Did you know the bee from the Dandy Wishes dies fits the DSP perfectly? So you can stamp and cut or just cut them out of the paper if you prefer.

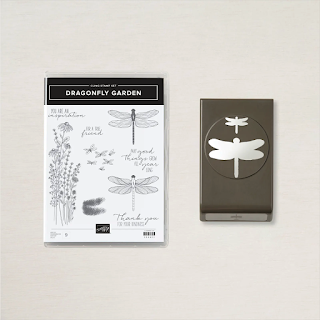
Similarly, the Dragonflies Punch fits both the stamp set and the DSP. You can punch both the largest and medium dragonflies from the paper although not at the same time. You will need to rough cut them out first to avoid spoiling the surrounding dragonflies. 

Dandy Dragonfly Garden Wishes Stampin Up

Since the ladies shared their projects in our private customer group at the weekend, orders for one or both of these amazing bundles have been flooding in. If you would like to order any of the products you see here, remember the best time to do so is before the end of the month, as orders over £45 will qualify for a free Sale-a-Bration item. You can either contact me and I will place the order for you – if you are local you an even hop on to my order and save shipping costs – or shop via my store. If you use February host code D6PKN76U, I’ll send you a thank you gift in March!

 
Please do check you are shopping with me at the store, as if you leave and return, it may default to a different demonstrator and/or lose the host code.
 
And if you have any questions about ordering, or would like to know more about maximising the value by purchasing the Starter Kit, please message me using the details on my website.


Read More »
Dandy Dragonfly Garden Wishes Stampin Up
 
Part two of my Dandy Garden Day projects features this little box of notecards. This set above shows the box and cards made using the Dragonfly Wishes bundle. 

Dandy Dragonfly Garden Wishes Stampin Up

However, once again I made samples using both the Garden Wishes and Dragonfly Garden bundles, and again guests could use the Designer Series Paper to add their dragonflies or bees, if their stamp set didn't feature the one they wanted. As you can see from the image above, I cut out the bee from Dandy Garden Designer Series Paper, even though there is one featured in the stamp set. 

We used Dandy Garden DSP to cover the box, just applying paper to the top, front and back. 
 
Wet adhesive such as Tombow is best when covering these Mini Paper Pumpkin Boxes as it gives you that all-important “wiggle room”. If you apply the DSP all while the box is flat, the paper will stretch so assemble the box first then apply adhesive to the top only, leaving DSP hanging over the front to cover the flap with about 5mm (3/16”) on each side and the bottom edge. 
 
Only when the top is stuck should you add adhesive to the front and back panels, then carefully smooth the paper around to adhere.

 
Dandy Dragonfly Garden Wishes Stampin Up

The first of our cards to go inside was arguably the most complex, although even this is not too fiddly. We stamped our tallest image on a white panel, popped this up onto the note card, showing a strip of co-ordinating DSP to the right. Then it's finished off with a dragonfly (stamped or cut from the paper), a greeting and a ladybird. 
 

The Ladybug Trinkets are hollow so the best way to stick them down is using Mini Glue Dots. Don’t have any Mini Glue Dots? (Why not, they’re amazing!) You could use a small piece of double-sided tape, but it will be fiddly!

Dandy Dragonfly Garden Wishes Stampin Up

This Designer Series Paper is too beautiful to hide so these cards show it off by making it a feature of both the cards and the envelopes.

Covering the envelope flap is really easy but be warned: 6x6" DSP is only wide enough to cover the flaps of a notecard envelope, not our standard C6. 

 Simply apply adhesive all over the envelope flap then, making sure you have the pattern the right way up (if that matters with your chosen design), stick the full piece of DSP to the flap, butting it up neatly to the fold. Then turn it over and cut it out freehand, using scissors. 

Dandy Dragonfly Garden Wishes Stampin Up

These cards are scaled right back but are no less striking for their simplicity. The card on the left features dandelions stamped onto separate cardstock and cut out with the dies. ‘Hello’ looked a bit lost on its own so I stamped it three times. 

The card on the right has its flowers stamped directly onto the notecard, with a popped up dragonfly cut out from the DSP. 

Dandy Dragonfly Garden Wishes Stampin Up
 

Even simpler are these two note cards, with no colouring, just the image stamped in a colour directly onto the card. In both cases, the inset is cut out from the DSP. Did you know the bee from the Dandy Wishes dies fits the DSP perfectly? So you can stamp and cut or just cut them out of the paper if you prefer.

Similarly, the Dragonflies Punch fits both the stamp set and the DSP. You can punch both the largest and medium dragonflies from the paper although not at the same time. You will need to rough cut them out first to avoid spoiling the surrounding dragonflies. 

Dandy Dragonfly Garden Wishes Stampin Up

Since the ladies shared their projects in our private customer group at the weekend, orders for one or both of these amazing bundles have been flooding in. If you would like to order any of the products you see here, remember the best time to do so is before the end of the month, as orders over £45 will qualify for a free Sale-a-Bration item. You can either contact me and I will place the order for you – if you are local you an even hop on to my order and save shipping costs – or shop via my store. If you use February host code D6PKN76U, I’ll send you a thank you gift in March!

 
Please do check you are shopping with me at the store, as if you leave and return, it may default to a different demonstrator and/or lose the host code.
 
And if you have any questions about ordering, or would like to know more about maximising the value by purchasing the Starter Kit, please message me using the details on my website.


Monday, 22 February 2021

Dandy Garden Suite: Garden Wishes or Dragonfly Garden?

Dandy Garden Wishes Dragonfly Stampin Up

The Dandy Garden Suite is ‘my’ suite. I love everything about it. Many Suites are lovely but none has spoken to me like this one has. But which stamp set is best? 


Dandy Garden Wishes Dragonfly Stampin Up

Garden Wishes?

Dandy Garden Wishes Dragonfly Stampin Up

Or Dragonfly Garden? 

I couldn’t decide so had to have both. In fact, I think I ordered the entire Suite Collection. 

To justify my investment, I decided to hold a big event. Normally I would hold an all-day event at this time of year, hire a local hall and get together with customers for a fun day of crafting. We may not be able to meet in person but I wasn’t going to let lockdown stop me from holding my event. So, just as I have been doing since last spring, I held it on Zoom.

This was a day of choices. I realised that not everyone would want to spend an entire day Zooming so offered the opportunity to book just for the morning or the afternoon. Turns out everyone was quite happy to spend the whole day on Zoom after all!

I couldn’t decide whether to run it with the Dragonfly Garden or the Garden Wishes stamp set... so I gave the guests a choice. Of course, this meant I had to make double the samples but it did show off the versatility of the sets beautifully. 

Dandy Garden Wishes Dragonfly Stampin Up

Both sets feature a tall flower stamp. Both feature a beautiful insect. And both co-ordinate with the Dandy Garden Designer Series Paper. Everyone received half a pack of this, giving them lots of options – and it also meant everyone who chose the Dragonfly Garden stamp set could cut out bees from the DSP, and everyone who chose the Garden Wishes stamp set could cut out dragonflies, just as you can see in the cards above. The top card has a dragonfly cut from the Designer Series Paper, while the bottom one is stamped and lightly coloured in.

We made so many projects that I am going to split them across two blog posts. Please come back on Thursday to see the second batch.

 Dandy Garden Wishes Dragonfly Stampin Up

Half of the day was spent making these four cards. This one is probably my favourite, using gorgeous Blackberry Bliss. I blended some ink around the bottom of the white cardstock using Blending Brushes. Those who don’t yet have these amazing brushes could use a sponge instead. 

To get the spatter effect, squeeze your ink pad to create a pool of ink in the lid. Using a wet (but not too wet) paintbrush, pick up some of this ink and splash this across the card. I do this by holding the paintbrush horizontally and tapping the top.
NB: The wetter your paint brush, the bigger and paler the spatters will be.


Dandy Garden Wishes Dragonfly Stampin Up
 
I made these Bumblebee cards deliberately different, to showcase the versatility of the DSP. They look so different with the bold designs on the right, or the subtle Bumblebee designs on the left, but which do you prefer? I can’t really decide. 


When attaching strips of DSP in a design like this, start with the two outer edge pieces, then finish off with the centre. That way you retain an even border around the outside edges of the card. 
 
Dandy Garden Wishes Dragonfly Stampin Up

This card again shows the versatility of the Dandy Garden Designer Series Paper. The card on the left uses a bumblebee cut out of the DSP, while the one on the right is stamped from the Garden Wishes stamp set. The images in the DSP meant nobody had to miss out, regardless of the stamp set they had chosen for their kit.

If you love these products as much as I do, I would urge you to act fast. No, they’re not going anywhere but if you order before the end of February, you can take advantage of Sale-a-Bration. 

Dandy Garden Wishes Dragonfly Stampin Up
 
Dandy Garden Wishes Dragonfly Stampin Up

Order both of the above and you can of course choose TWO Sale-a-Bration items or one Level 2 SAB item.  If you are in the UK and would like to order, please visit my store and, if you use the February host code D6PKN76U, I’ll send you a thank you gift in March!

However, for the best value of all, I would recommend the Starter Kit, which gives you £130 of craft supplies of your choice, plus five packs of Designer Series Paper worth £53.75. It’s shipped to you free of charge and entitles you to discounts and sneak peeks. Please do message me via my website to find out more or click here to get started

Dandy Garden Wishes Dragonfly Stampin Up

Please message me via my website


Read More »
Dandy Garden Wishes Dragonfly Stampin Up

The Dandy Garden Suite is ‘my’ suite. I love everything about it. Many Suites are lovely but none has spoken to me like this one has. But which stamp set is best? 


Dandy Garden Wishes Dragonfly Stampin Up

Garden Wishes?

Dandy Garden Wishes Dragonfly Stampin Up

Or Dragonfly Garden? 

I couldn’t decide so had to have both. In fact, I think I ordered the entire Suite Collection. 

To justify my investment, I decided to hold a big event. Normally I would hold an all-day event at this time of year, hire a local hall and get together with customers for a fun day of crafting. We may not be able to meet in person but I wasn’t going to let lockdown stop me from holding my event. So, just as I have been doing since last spring, I held it on Zoom.

This was a day of choices. I realised that not everyone would want to spend an entire day Zooming so offered the opportunity to book just for the morning or the afternoon. Turns out everyone was quite happy to spend the whole day on Zoom after all!

I couldn’t decide whether to run it with the Dragonfly Garden or the Garden Wishes stamp set... so I gave the guests a choice. Of course, this meant I had to make double the samples but it did show off the versatility of the sets beautifully. 

Dandy Garden Wishes Dragonfly Stampin Up

Both sets feature a tall flower stamp. Both feature a beautiful insect. And both co-ordinate with the Dandy Garden Designer Series Paper. Everyone received half a pack of this, giving them lots of options – and it also meant everyone who chose the Dragonfly Garden stamp set could cut out bees from the DSP, and everyone who chose the Garden Wishes stamp set could cut out dragonflies, just as you can see in the cards above. The top card has a dragonfly cut from the Designer Series Paper, while the bottom one is stamped and lightly coloured in.

We made so many projects that I am going to split them across two blog posts. Please come back on Thursday to see the second batch.

 Dandy Garden Wishes Dragonfly Stampin Up

Half of the day was spent making these four cards. This one is probably my favourite, using gorgeous Blackberry Bliss. I blended some ink around the bottom of the white cardstock using Blending Brushes. Those who don’t yet have these amazing brushes could use a sponge instead. 

To get the spatter effect, squeeze your ink pad to create a pool of ink in the lid. Using a wet (but not too wet) paintbrush, pick up some of this ink and splash this across the card. I do this by holding the paintbrush horizontally and tapping the top.
NB: The wetter your paint brush, the bigger and paler the spatters will be.


Dandy Garden Wishes Dragonfly Stampin Up
 
I made these Bumblebee cards deliberately different, to showcase the versatility of the DSP. They look so different with the bold designs on the right, or the subtle Bumblebee designs on the left, but which do you prefer? I can’t really decide. 


When attaching strips of DSP in a design like this, start with the two outer edge pieces, then finish off with the centre. That way you retain an even border around the outside edges of the card. 
 
Dandy Garden Wishes Dragonfly Stampin Up

This card again shows the versatility of the Dandy Garden Designer Series Paper. The card on the left uses a bumblebee cut out of the DSP, while the one on the right is stamped from the Garden Wishes stamp set. The images in the DSP meant nobody had to miss out, regardless of the stamp set they had chosen for their kit.

If you love these products as much as I do, I would urge you to act fast. No, they’re not going anywhere but if you order before the end of February, you can take advantage of Sale-a-Bration. 

Dandy Garden Wishes Dragonfly Stampin Up
 
Dandy Garden Wishes Dragonfly Stampin Up

Order both of the above and you can of course choose TWO Sale-a-Bration items or one Level 2 SAB item.  If you are in the UK and would like to order, please visit my store and, if you use the February host code D6PKN76U, I’ll send you a thank you gift in March!

However, for the best value of all, I would recommend the Starter Kit, which gives you £130 of craft supplies of your choice, plus five packs of Designer Series Paper worth £53.75. It’s shipped to you free of charge and entitles you to discounts and sneak peeks. Please do message me via my website to find out more or click here to get started

Dandy Garden Wishes Dragonfly Stampin Up

Please message me via my website


Thursday, 18 February 2021

Spring-themed blog hop with Dandy Wishes Dies

 
What’s your favourite season? Schitts Creek fans may channel their inner Moira Rose and answer ‘awards’ but for me it has to be spring. I love it when the days start to warm up and nature comes back to life, with daffodils and catkins and birds nesting and... you get the idea.
Spring blog hop stampin up

So I jumped at the opportunity to take part in a spring-themed blog hop with Stampin’ Up!® demonstrators around the world. I signed up ages ago but when it came to making the projects, for some reason I struggled.

I think it’s because my desire to play with new stamps clashed wildly with my pedantic nature. That ruled out Sweet Strawberry (late summer), Enjoy the Moment (autumn) and Garden Wishes (summer again).

Dandy Wishes Dies Hey Birthday Chick Stampin Up

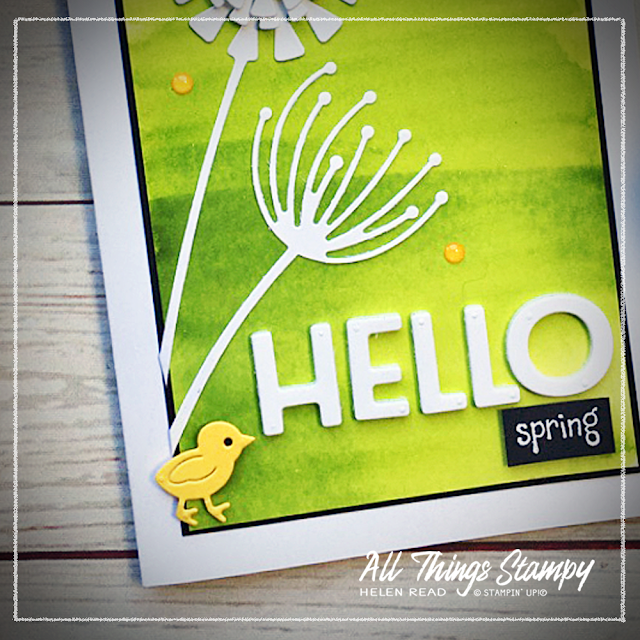
Eventually I forced myself to cast pedantry aside and play with my Dandy Wishes Dies to create some non-specific flower/seed heads. I cunningly decided to meet the requirements of the theme by adding ‘Hello spring’ using the wonderful Playful Alphabet Dies and by masking off a sentiment stamp from Hey Birthday Chick
 
FOAM ADHESIVE SHEETS Stampin Up

Here I have to give a massive shout out for the Foam Adhesive Sheets which are – and I don’t use these words lightly – a game changer. Use these on your small die-cuts and you won’t have to fiddle around cutting up pieces of Dimensionals and your projects will look neater, too.


Dandy Wishes Dies Hey Birthday Chick Stampin Up

Just as I’d reached the ‘it’ll do’ stage of project making, out of the craftermath of another project, this little chick crept onto the project and practically fell into place, fortifying my rather tenuous theme. So I let him stay. 

How I created the background

I created the background for this card using my Granny Apple Green ink pad and some Shimmery White cardstock. 
 
I’ll let you into a secret: I’m a pretty impatient crafter. I know, right? Who knew? 
 
So when I discovered that my Granny Apple Green ink pad needed re-inking but I didn’t have a refill, I lost patience with trying to squeeze the pad to get ink into the lid and simply swiped it across the bottom edge of my paper. This was pretty ugly, so I used a big paintbrush and some water to wash it upwards to create this background. Then I simply cut off the ugly bit! I love its vibrancy and the fact it was so quick!

Dandy Wishes Dies Hey Birthday Chick Stampin Up

Chickens now firmly on my mind, I created the second card using Hey Birthday Chick again. I’m so happy to see the return of this crazy-haired chick – and I know my customers are, too! I coloured the chicken using Stampin’ Blends in Pool Party (light and dark), Daffodil Delight (light and dark) and Pumpkin Pie (dark).
 

How I created the background

This time I used my new Blending Brushes to apply Coastal Cabana ink at the top and Granny Apple Green at the bottom. I avoided the sun area at the top, then added some Daffodil Delight in a circular motion, before popping up this ‘sun’ (it’s really part of a flower head from the Dandy Wishes Dies) which I’d die-cut from a rejected watercoloured piece from a few days before. Waste not, want not!

Finally, I completed my background effect by spattering some diluted Whisper White Craft Ink onto the top section using a small paintbrush. 
 
Dandy Wishes Dies Hey Birthday Chick Stampin Up

Again, I used the Dandy Garden Dies, this time in Basic Black for a silhouette effect.

‘Let’s celebrate spring’ is a mash-up of two sentiment stamps in the Hey Birthday Chick stamp set. I masked off the ‘YOU’ and stamped ‘Let’s celebrate’, then masked off all but ‘spring’ to stamp separately on a scrap of Granny Apple Green cardstock. 

You can get more mileage from your die-cut pieces by cutting them up. Here I’ve trimmed off the outer edges of the lower die-cut seed head to get a different look for contrast. And I’ve trimmed away the cake from the chicken image so it looks like it’s pecking at the words instead.

And now it’s time to see what everyone else has created. Please head to these blogs to see some spring-themed inspiration from around the world...


Read More »

 
What’s your favourite season? Schitts Creek fans may channel their inner Moira Rose and answer ‘awards’ but for me it has to be spring. I love it when the days start to warm up and nature comes back to life, with daffodils and catkins and birds nesting and... you get the idea.
Spring blog hop stampin up

So I jumped at the opportunity to take part in a spring-themed blog hop with Stampin’ Up!® demonstrators around the world. I signed up ages ago but when it came to making the projects, for some reason I struggled.

I think it’s because my desire to play with new stamps clashed wildly with my pedantic nature. That ruled out Sweet Strawberry (late summer), Enjoy the Moment (autumn) and Garden Wishes (summer again).

Dandy Wishes Dies Hey Birthday Chick Stampin Up

Eventually I forced myself to cast pedantry aside and play with my Dandy Wishes Dies to create some non-specific flower/seed heads. I cunningly decided to meet the requirements of the theme by adding ‘Hello spring’ using the wonderful Playful Alphabet Dies and by masking off a sentiment stamp from Hey Birthday Chick
 
FOAM ADHESIVE SHEETS Stampin Up

Here I have to give a massive shout out for the Foam Adhesive Sheets which are – and I don’t use these words lightly – a game changer. Use these on your small die-cuts and you won’t have to fiddle around cutting up pieces of Dimensionals and your projects will look neater, too.


Dandy Wishes Dies Hey Birthday Chick Stampin Up

Just as I’d reached the ‘it’ll do’ stage of project making, out of the craftermath of another project, this little chick crept onto the project and practically fell into place, fortifying my rather tenuous theme. So I let him stay. 

How I created the background

I created the background for this card using my Granny Apple Green ink pad and some Shimmery White cardstock. 
 
I’ll let you into a secret: I’m a pretty impatient crafter. I know, right? Who knew? 
 
So when I discovered that my Granny Apple Green ink pad needed re-inking but I didn’t have a refill, I lost patience with trying to squeeze the pad to get ink into the lid and simply swiped it across the bottom edge of my paper. This was pretty ugly, so I used a big paintbrush and some water to wash it upwards to create this background. Then I simply cut off the ugly bit! I love its vibrancy and the fact it was so quick!

Dandy Wishes Dies Hey Birthday Chick Stampin Up

Chickens now firmly on my mind, I created the second card using Hey Birthday Chick again. I’m so happy to see the return of this crazy-haired chick – and I know my customers are, too! I coloured the chicken using Stampin’ Blends in Pool Party (light and dark), Daffodil Delight (light and dark) and Pumpkin Pie (dark).
 

How I created the background

This time I used my new Blending Brushes to apply Coastal Cabana ink at the top and Granny Apple Green at the bottom. I avoided the sun area at the top, then added some Daffodil Delight in a circular motion, before popping up this ‘sun’ (it’s really part of a flower head from the Dandy Wishes Dies) which I’d die-cut from a rejected watercoloured piece from a few days before. Waste not, want not!

Finally, I completed my background effect by spattering some diluted Whisper White Craft Ink onto the top section using a small paintbrush. 
 
Dandy Wishes Dies Hey Birthday Chick Stampin Up

Again, I used the Dandy Garden Dies, this time in Basic Black for a silhouette effect.

‘Let’s celebrate spring’ is a mash-up of two sentiment stamps in the Hey Birthday Chick stamp set. I masked off the ‘YOU’ and stamped ‘Let’s celebrate’, then masked off all but ‘spring’ to stamp separately on a scrap of Granny Apple Green cardstock. 

You can get more mileage from your die-cut pieces by cutting them up. Here I’ve trimmed off the outer edges of the lower die-cut seed head to get a different look for contrast. And I’ve trimmed away the cake from the chicken image so it looks like it’s pecking at the words instead.

And now it’s time to see what everyone else has created. Please head to these blogs to see some spring-themed inspiration from around the world...


Monday, 15 February 2021

Hey Chick and Hey Birthday Chick

Hey Birthday Chick Stampin Up

Who wants to see more chicken samples? I have lots to show you today, this time using both of the stamp sets in the Hey Chick promotion.

In an unprecedented move (honestly, who else is sick of that word? How about ‘remarkable’, ‘unheard of’ or ‘atypical’ instead?), Stampin’ Up!® have brought back Hey Chick, an old favourite stamp set from Sale-a-Bration 2017. And four years on, it remains as popular as ever. It’s a great opportunity to buy the Hey Chick stamp set if you don’t already have it – and this time you have the option of adding dies, too. 

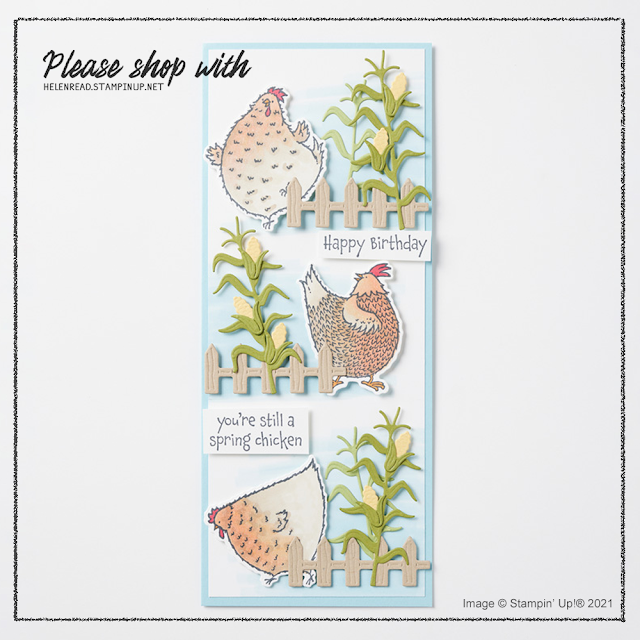
The dies are fabulous – with lots of fun little extra touches such as a chicken coop, bag of grain, picket fence, tree stump and some really tiny ears of corn. What’s not to like?
 
 
Hey Birthday Chick Stampin Up

As well as the return of Hey Chick, there is Hey Birthday Chick in the January-June Mini Catalogue, which also has coordinating dies. 
 
Hey Birthday Chick Stampin Up
 
Hey Birthday Chick Stampin Up

Take a look at some of these great projects made by the SU design team. Aren’t they fabulously inspiring?

Hey Birthday Chick Stampin Up
 
Hey Birthday Chick Stampin Up

Hey Birthday Chick Stampin Up
 
And if you’re wondering what I’ve been up to all week, it’s been preparing for a blog hop on Thursday and also for my Dandy Garden Day this coming Saturday – which has been fraught with challenges because I wasn’t sure if my parcel would arrive in time... and then it did... but then it was half empty.

In case you’re not in the UK, or have just not been ordering lately, we have been having major problems with orders taking weeks to arrive, then arriving tampered with... hence my missing items. This has been as a result of Brexit + pandemic but I’m pleased to say the problems are now almost ironed out; orders are taking a bit longer than usual but arriving in a more timely fashion and intact!

Thankfully, demonstrators helped me out again, and my hoarding tendencies came to the rescue too, so my class can go ahead after all!
 
 
The Hey Chick promotion runs until the end of June, although bear in mind products will switch to ‘while supplies last’ towards the ened of this period.  If you are in the UK and would like to order, please visit my store and, if you use the February host code D6PKN76U, I’ll send you a thank you gift in March!


Does your wish list come to more than £99? Please get in touch and I will help you get more for your money and unlock discounts all year round.  


Read More »
Hey Birthday Chick Stampin Up

Who wants to see more chicken samples? I have lots to show you today, this time using both of the stamp sets in the Hey Chick promotion.

In an unprecedented move (honestly, who else is sick of that word? How about ‘remarkable’, ‘unheard of’ or ‘atypical’ instead?), Stampin’ Up!® have brought back Hey Chick, an old favourite stamp set from Sale-a-Bration 2017. And four years on, it remains as popular as ever. It’s a great opportunity to buy the Hey Chick stamp set if you don’t already have it – and this time you have the option of adding dies, too. 

The dies are fabulous – with lots of fun little extra touches such as a chicken coop, bag of grain, picket fence, tree stump and some really tiny ears of corn. What’s not to like?
 
 
Hey Birthday Chick Stampin Up

As well as the return of Hey Chick, there is Hey Birthday Chick in the January-June Mini Catalogue, which also has coordinating dies. 
 
Hey Birthday Chick Stampin Up
 
Hey Birthday Chick Stampin Up

Take a look at some of these great projects made by the SU design team. Aren’t they fabulously inspiring?

Hey Birthday Chick Stampin Up
 
Hey Birthday Chick Stampin Up

Hey Birthday Chick Stampin Up
 
And if you’re wondering what I’ve been up to all week, it’s been preparing for a blog hop on Thursday and also for my Dandy Garden Day this coming Saturday – which has been fraught with challenges because I wasn’t sure if my parcel would arrive in time... and then it did... but then it was half empty.

In case you’re not in the UK, or have just not been ordering lately, we have been having major problems with orders taking weeks to arrive, then arriving tampered with... hence my missing items. This has been as a result of Brexit + pandemic but I’m pleased to say the problems are now almost ironed out; orders are taking a bit longer than usual but arriving in a more timely fashion and intact!

Thankfully, demonstrators helped me out again, and my hoarding tendencies came to the rescue too, so my class can go ahead after all!
 
 
The Hey Chick promotion runs until the end of June, although bear in mind products will switch to ‘while supplies last’ towards the ened of this period.  If you are in the UK and would like to order, please visit my store and, if you use the February host code D6PKN76U, I’ll send you a thank you gift in March!


Does your wish list come to more than £99? Please get in touch and I will help you get more for your money and unlock discounts all year round.  


Monday, 8 February 2021

Fun with Hey Birthday Chick stamps and dies

Hey Birthday Chick Stampin Up

I am totally hen-amoured with our Hey Chick and Hey Birthday Chick bundles. I loved Hey Chick back in 2017 when it was our most popular Sale-a-Bration stamp set, and I still love it today. Everyone who has kept their Hey Chick Sale-a-Bration stamp set since then will be delighted with the fun dies which are now available. 
 
I love Hey Birthday Chick in the new Stampin’ Up!® January-June Mini Catalogue, too, and that also now has dies available. What fun bundles they both are!
 
Hey Birthday Chick Stampin Up

Hey Birthday Chick Stampin Up
 
In this rather busy card, I’ve attempted to hen-capsulate the sheer joy and silliness of Hey Birthday Chick. But once you’ve stamped and die-cut these hen-gaging hens, you just can’t stop colouring them. And once they’re coloured in, you may as well use them, which is how I ended up with this totally bonkers birthday card. 


How to avoid die-cutting fatigue

 
As is so often the case, the Stamparatus is your friend here. 
Here’s how you can die-cut multiple chickens (or any shape) quickly and accurately:

  • Place your cardstock in the corner of the Stamparatus and position all your chickens on the plate with some space around them to allow for the dies. 
  • Stamp all your chickens in one go.
  • Leave the cardstock and stamps in the same position on the Stamparatus (that’s really important!).
  • Die-cut the chickens as normal, being extra careful to do so accurately.
  • Now you can die-cut a pile of chickens from blank cardstock which means a) you don't have to worry about positioning and b) you can maximise use of cardstock as you don’t have to leave space around them.
  • Now just slot the chickens into your cardstock template and stamp for perfect positioning every time.

Can you use the template again? Yes... but only for as long as you leave the stamps on the Stamparatus plate. If you remove the stamps from the plate, you can try placing the stamps into the template and picking them up with the plate and you might get away with it. This would be easier with photopolymer stamps but with red rubber you may find you have start the process again and create a new one.

That was a long tip, wasn't it? Back to more Hey Birthday Chick cards... 
 
Hey Birthday Chick Stampin Up

I made a batch of these for my customer thank yous for their January orders – chickens are for life, not just for birthdays! 
 
I used the sentiment “Good things are worth waiting for” from Enjoy the Moment to acknowledge the fact that their January orders have taken so long to arrive due to Brexit-related customs delays. I share their pain and have been tracking their parcels with them.

I did something really rash with my brand new Enjoy the Moment stamp set. I actually cut this stamp up so I could stamp it on two lines easily. The joy of unmounted stamps is that you can put them back together on the block if you want to. The rash bit was doing this AFTER I’d added the label... and my label positioning wasn’t perfect so now it just looks like a dog’s dinner. A fully functional dog’s dinner but it’s still a little galling.

I used Shimmery White cardstock for the main panel here and watercoloured the background with a big brush and some Granny Apple Green and Coastal Cabana ink picked it up from the lid in the time-honoured fashion. I find Shimmery White is a bit more tolerant of watercolouring than Whisper White. I haven’t had chance to try it on our new Basic White just yet because, you know, Customs...

I had fun colouring these cheeky chickens with my Stampin’ Blends and experimented with a few colours. Which one do you like the best?
 

How I coloured the chickens

 
Hey Birthday Chick Stampin Up
 
This one is simply done in Daffodil Delight, light and dark, with a Pumpkin Pie beak and a Poppy Parade comb. The chick is the same, but with an Ivory eggshell. 

Hey Birthday Chick Stampin Up

For this chicken I used Granny Apple Green, light and dark, with some Daffodil Delight light and dark for the belly, wings and tail. Do you like the little picket fence? I love it. The new Birthday Chick Dies have lots of fun little elements like this, as do the Hey Chick Dies, as you can see above. 

Hey Birthday Chick Stampin Up

This one is a bit more high maintenance. I began with a strip of dark Rich Razzleberry around the base and up towards the tail, then switched to light Rich Razzleberry to start blending upwards and a little all the way round. Then, as I don't have any paler purples or dark pinks, I switched to light Calypso Coral for the paler areas, finishing off with a light Petal Pink towards the belly. Yes, four markers for one chicken... six if you count the Poppy Parade comb and Pumpkin Pie beak!

 
The Hey Chick promotion runs until the end of June, although bear in mind products will switch to ‘while supplies last’ towards the ened of this period.  If you are in the UK and would like to order, please visit my store and, if you use the February host code D6PKN76U, I’ll send you a thank you gift in March!


Does your wish list come to more than £99? Please get in touch and I will help you get more for your money and unlock discounts all year round.  
 

NB: Please note orders are currently taking quite a bit longer than usual to arrive, due to a combination of extra paperwork required following Brexit, lower staffing levels due to the pandemic, and an influx of orders as a result of both lockdown and Sale-a-Bration. Please ask if you require more information.


Read More »
Hey Birthday Chick Stampin Up

I am totally hen-amoured with our Hey Chick and Hey Birthday Chick bundles. I loved Hey Chick back in 2017 when it was our most popular Sale-a-Bration stamp set, and I still love it today. Everyone who has kept their Hey Chick Sale-a-Bration stamp set since then will be delighted with the fun dies which are now available. 
 
I love Hey Birthday Chick in the new Stampin’ Up!® January-June Mini Catalogue, too, and that also now has dies available. What fun bundles they both are!
 
Hey Birthday Chick Stampin Up

Hey Birthday Chick Stampin Up
 
In this rather busy card, I’ve attempted to hen-capsulate the sheer joy and silliness of Hey Birthday Chick. But once you’ve stamped and die-cut these hen-gaging hens, you just can’t stop colouring them. And once they’re coloured in, you may as well use them, which is how I ended up with this totally bonkers birthday card. 


How to avoid die-cutting fatigue

 
As is so often the case, the Stamparatus is your friend here. 
Here’s how you can die-cut multiple chickens (or any shape) quickly and accurately:

  • Place your cardstock in the corner of the Stamparatus and position all your chickens on the plate with some space around them to allow for the dies. 
  • Stamp all your chickens in one go.
  • Leave the cardstock and stamps in the same position on the Stamparatus (that’s really important!).
  • Die-cut the chickens as normal, being extra careful to do so accurately.
  • Now you can die-cut a pile of chickens from blank cardstock which means a) you don't have to worry about positioning and b) you can maximise use of cardstock as you don’t have to leave space around them.
  • Now just slot the chickens into your cardstock template and stamp for perfect positioning every time.

Can you use the template again? Yes... but only for as long as you leave the stamps on the Stamparatus plate. If you remove the stamps from the plate, you can try placing the stamps into the template and picking them up with the plate and you might get away with it. This would be easier with photopolymer stamps but with red rubber you may find you have start the process again and create a new one.

That was a long tip, wasn't it? Back to more Hey Birthday Chick cards... 
 
Hey Birthday Chick Stampin Up

I made a batch of these for my customer thank yous for their January orders – chickens are for life, not just for birthdays! 
 
I used the sentiment “Good things are worth waiting for” from Enjoy the Moment to acknowledge the fact that their January orders have taken so long to arrive due to Brexit-related customs delays. I share their pain and have been tracking their parcels with them.

I did something really rash with my brand new Enjoy the Moment stamp set. I actually cut this stamp up so I could stamp it on two lines easily. The joy of unmounted stamps is that you can put them back together on the block if you want to. The rash bit was doing this AFTER I’d added the label... and my label positioning wasn’t perfect so now it just looks like a dog’s dinner. A fully functional dog’s dinner but it’s still a little galling.

I used Shimmery White cardstock for the main panel here and watercoloured the background with a big brush and some Granny Apple Green and Coastal Cabana ink picked it up from the lid in the time-honoured fashion. I find Shimmery White is a bit more tolerant of watercolouring than Whisper White. I haven’t had chance to try it on our new Basic White just yet because, you know, Customs...

I had fun colouring these cheeky chickens with my Stampin’ Blends and experimented with a few colours. Which one do you like the best?
 

How I coloured the chickens

 
Hey Birthday Chick Stampin Up
 
This one is simply done in Daffodil Delight, light and dark, with a Pumpkin Pie beak and a Poppy Parade comb. The chick is the same, but with an Ivory eggshell. 

Hey Birthday Chick Stampin Up

For this chicken I used Granny Apple Green, light and dark, with some Daffodil Delight light and dark for the belly, wings and tail. Do you like the little picket fence? I love it. The new Birthday Chick Dies have lots of fun little elements like this, as do the Hey Chick Dies, as you can see above. 

Hey Birthday Chick Stampin Up

This one is a bit more high maintenance. I began with a strip of dark Rich Razzleberry around the base and up towards the tail, then switched to light Rich Razzleberry to start blending upwards and a little all the way round. Then, as I don't have any paler purples or dark pinks, I switched to light Calypso Coral for the paler areas, finishing off with a light Petal Pink towards the belly. Yes, four markers for one chicken... six if you count the Poppy Parade comb and Pumpkin Pie beak!

 
The Hey Chick promotion runs until the end of June, although bear in mind products will switch to ‘while supplies last’ towards the ened of this period.  If you are in the UK and would like to order, please visit my store and, if you use the February host code D6PKN76U, I’ll send you a thank you gift in March!


Does your wish list come to more than £99? Please get in touch and I will help you get more for your money and unlock discounts all year round.  
 

NB: Please note orders are currently taking quite a bit longer than usual to arrive, due to a combination of extra paperwork required following Brexit, lower staffing levels due to the pandemic, and an influx of orders as a result of both lockdown and Sale-a-Bration. Please ask if you require more information.