Wednesday, 27 July 2016

Best Birds seed boxes


This is another of the projects from my Best Birds workshop. It’s a really simple box with lid, with an aperture to allow you to see the contents: a cello bag full of black pumpkin seeds for the birds. We’re big bird-feeders in this house and my husband was really excited to see a nuthatch in the garden the other week. Sadly I was out and missed it as we’ve been waiting 23 years!
Anyway, back to the box: the base and the lid are each made from a sheet of 6x6; the base is Kraft, while the lid is Serene Scenery DSP (which I absolutely love). the Kraft is scored at 1in from each side, the DSP is scored at 2.5cm from each side. The very slight difference in the two measurements should allow the lid to fit snugly. 

The aperture is created using the old-style circle dies as I don’t yet have the new ones, but I’ve linked to the new ones below as those are they ones which are available. But any size circle will do; you just can’t do it with a punch though, as it won’t reach that far. 

To get the circle in the centre, we drew diagonal lines, corner to corner, with a pencil on the reverse side, so the cross in the middle allowed us to centre the die. 

I made two samples so I had one to show each table and so the ladies could choose which one to make, using whichever sheet of DSP they preferred, as they had one of each design to play with. It’s all held together with that old favourite, linen thread. 


Read More »

This is another of the projects from my Best Birds workshop. It’s a really simple box with lid, with an aperture to allow you to see the contents: a cello bag full of black pumpkin seeds for the birds. We’re big bird-feeders in this house and my husband was really excited to see a nuthatch in the garden the other week. Sadly I was out and missed it as we’ve been waiting 23 years!

Anyway, back to the box: the base and the lid are each made from a sheet of 6x6; the base is Kraft, while the lid is Serene Scenery DSP (which I absolutely love). the Kraft is scored at 1in from each side, the DSP is scored at 2.5cm from each side. The very slight difference in the two measurements should allow the lid to fit snugly. 

The aperture is created using the old-style circle dies as I don’t yet have the new ones, but I’ve linked to the new ones below as those are they ones which are available. But any size circle will do; you just can’t do it with a punch though, as it won’t reach that far. 

To get the circle in the centre, we drew diagonal lines, corner to corner, with a pencil on the reverse side, so the cross in the middle allowed us to centre the die. 

I made two samples so I had one to show each table and so the ladies could choose which one to make, using whichever sheet of DSP they preferred, as they had one of each design to play with. It’s all held together with that old favourite, linen thread. 


Monday, 25 July 2016

Mix It Up Monday: Best Birds


It’s Mix It Up Monday again and time for another project made with a colour combination from my latest set of In Color charts.

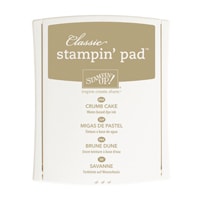
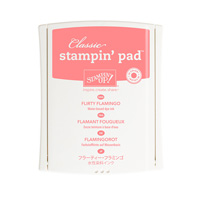
It’s time for another outing for Flirty Flamingo although I barely dipped my toe into the pink ink. I must try harder to overcome my pink phobia! I made a batch of these cards to thank the ladies who ordered from me this month. I also learned an important lesson about planning as I began by rolling out loads of Very Vanilla birds before placing one on the card and deciding it didn’t stand out enough as it was too similar to the Very Vanilla background. Doh! So I had the choice of colouring them all in or die-cutting another batch in Crumb Cake. As you can see, I went for the latter. 

And honestly, the branch IS made from Chocolate Chip (I just double-checked), although the photo makes it look more like Early Espresso. I’m not taking another one, this is already my second attempt!


Read More »

It’s Mix It Up Monday again and time for another project made with a colour combination from my latest set of In Color charts.

It’s time for another outing for Flirty Flamingo although I barely dipped my toe into the pink ink. I must try harder to overcome my pink phobia! I made a batch of these cards to thank the ladies who ordered from me this month. I also learned an important lesson about planning as I began by rolling out loads of Very Vanilla birds before placing one on the card and deciding it didn’t stand out enough as it was too similar to the Very Vanilla background. Doh! So I had the choice of colouring them all in or die-cutting another batch in Crumb Cake. As you can see, I went for the latter. 

And honestly, the branch IS made from Chocolate Chip (I just double-checked), although the photo makes it look more like Early Espresso. I’m not taking another one, this is already my second attempt!


Saturday, 23 July 2016

Caturday: Rocket Ron


It’s been summer here in the UK this week and Tuesday was particularly hot. (“How hot?”, my Canadian cousin will ask. “In the early 30s” I reply... and then, following her snort of derision, I will remind her that we don’t have air-con and we aren’t used to such temperatures.)

Somebody who clearly isn’t coping with the heat is Rocket Ron (extremely local reference there for those of us of a certain age), a visitor to my friend Kelly’s house, who in the hot weather this week, flaked out on her kitchen floor. 

Our cats have been struggling too, particularly Mr Winky, the black one; we’ve barely seen him, so I suspect he’s been hiding in some cool foliage. 


Read More »

It’s been summer here in the UK this week and Tuesday was particularly hot. (“How hot?”, my Canadian cousin will ask. “In the early 30s” I reply... and then, following her snort of derision, I will remind her that we don’t have air-con and we aren’t used to such temperatures.)

Somebody who clearly isn’t coping with the heat is Rocket Ron (extremely local reference there for those of us of a certain age), a visitor to my friend Kelly’s house, who in the hot weather this week, flaked out on her kitchen floor. 

Our cats have been struggling too, particularly Mr Winky, the black one; we’ve barely seen him, so I suspect he’s been hiding in some cool foliage. 


Thursday, 21 July 2016

Best Birds birdhouse


Last Friday was my much-anticipated Best Birds workshop, in which we played with the brand new Best Birds bundle and the Serene Scenery Designer Series Paper stack.

This was the main project, designed by my friend Kelly for the occasion, although this particular one was recreated by me so that we could have two samples on the go, one for each crafty table.

It’s a time-consuming project, but not particularly difficult. It helps that the mini birdhouses (from Poundland, I’ll let you guess the price) are already Mint Macaron, although they were also available in grey.

What wasn’t great was having to do all that die-cutting! Six twigs per birdhouse, plus others for other projects was quite time-consuming; in the end I did them so that people could get on with their projects.

Top tip 1: Photopolymer stamps are extremely flexible, which can be an advantage as it gives you options to play with the images. However, when you are die-cutting the image, it’s important to place the stamp on the block in the correct manner, or the die won’t fit around it neatly. We overcame this by laying the stamp on top of the die, then pressing the block onto it.

Top tip 2: There is a die for the little flower but, when you’re cutting nine for one project, plus extras for additional projects, it’s actually quicker to fussy-cut them!

Top tip 3: To get the circle die-cut out of the front piece of cardstock in exactly the right place, we held the piece over the birdhouse, stamped side down, and rubbed firmly around the edge of the hole, rather like brass-rubbing. This gave a faint impression of the circle, which could then be outlined with a pencil to provide a guide for die placement.


Blender Pens
[102845]
£9.00

Read More »

Last Friday was my much-anticipated Best Birds workshop, in which we played with the brand new Best Birds bundle and the Serene Scenery Designer Series Paper stack.

This was the main project, designed by my friend Kelly for the occasion, although this particular one was recreated by me so that we could have two samples on the go, one for each crafty table.

It’s a time-consuming project, but not particularly difficult. It helps that the mini birdhouses (from Poundland, I’ll let you guess the price) are already Mint Macaron, although they were also available in grey.

What wasn’t great was having to do all that die-cutting! Six twigs per birdhouse, plus others for other projects was quite time-consuming; in the end I did them so that people could get on with their projects.

Top tip 1: Photopolymer stamps are extremely flexible, which can be an advantage as it gives you options to play with the images. However, when you are die-cutting the image, it’s important to place the stamp on the block in the correct manner, or the die won’t fit around it neatly. We overcame this by laying the stamp on top of the die, then pressing the block onto it.

Top tip 2: There is a die for the little flower but, when you’re cutting nine for one project, plus extras for additional projects, it’s actually quicker to fussy-cut them!

Top tip 3: To get the circle die-cut out of the front piece of cardstock in exactly the right place, we held the piece over the birdhouse, stamped side down, and rubbed firmly around the edge of the hole, rather like brass-rubbing. This gave a faint impression of the circle, which could then be outlined with a pencil to provide a guide for die placement.


Blender Pens
[102845]
£9.00

Monday, 18 July 2016

Mix It Up Monday: Birthday Fiesta llamas


It’s Mix It Up Monday again and time for another project made with a colour combination from my latest set of In Color charts.

I don’t know if I’ve ever mentioned it (I do really) but I really LOVE llamas. They really are great for very many reasons... the main one being: they are GREAT. 

Anyway, a friend of my husband’s has just bought a house with land and plans to fill it with animals. She’s started with a couple of pigs but, although I have a pig stamp in Barnyard Babies, I wanted to look to the future, as she also hopes to get some alpacas. They’re smaller than llamas and slightly different in shape, but this is the best I could do for their new home card. Really, I just wanted an excuse to use the llama stamp again. It ’s such a fun stamp, I don’t know why everybody doesn’t buy it! 

This is my favourite colour combination for this set at the moment. I thought I’d ignore the harsh oranges and pinks of the catalogue samples (although only until next Monday, hint, hint), and tone things down with some Cherry Cobbler and Early Espresso, for a more Peruvian look. I love it! 


Read More »

It’s Mix It Up Monday again and time for another project made with a colour combination from my latest set of In Color charts.

I don’t know if I’ve ever mentioned it (I do really) but I really LOVE llamas. They really are great for very many reasons... the main one being: they are GREAT. 

Anyway, a friend of my husband’s has just bought a house with land and plans to fill it with animals. She’s started with a couple of pigs but, although I have a pig stamp in Barnyard Babies, I wanted to look to the future, as she also hopes to get some alpacas. They’re smaller than llamas and slightly different in shape, but this is the best I could do for their new home card. Really, I just wanted an excuse to use the llama stamp again. It ’s such a fun stamp, I don’t know why everybody doesn’t buy it! 

This is my favourite colour combination for this set at the moment. I thought I’d ignore the harsh oranges and pinks of the catalogue samples (although only until next Monday, hint, hint), and tone things down with some Cherry Cobbler and Early Espresso, for a more Peruvian look. I love it! 


Saturday, 16 July 2016

Caturday: Maggie and Eddie


It’s Caturday again! Don’t they come round quickly at the moment? Every day is Caturday for Maggie (left) and Eddie here, busy spreading cat hairs all over the stripped bed. They belong to my friend and helper Kelly, who adopted them from Woodland Nook a couple of years ago. They’ve definitely landed on their feet there!

If you’d like your cat to feature in Caturday, just drop me a line and you kitty could be the star. Now that I’m not visiting the shelter every weekend, I don’t have as many pictures to choose from!
Read More »


It’s Caturday again! Don’t they come round quickly at the moment? Every day is Caturday for Maggie (left) and Eddie here, busy spreading cat hairs all over the stripped bed. They belong to my friend and helper Kelly, who adopted them from Woodland Nook a couple of years ago. They’ve definitely landed on their feet there!

If you’d like your cat to feature in Caturday, just drop me a line and you kitty could be the star. Now that I’m not visiting the shelter every weekend, I don’t have as many pictures to choose from!

Wednesday, 13 July 2016

Love You Lots with paint splatter technique


How fun is this? Ignore the copper embossing; while I love the new copper embossing powder, it really doesn't work on this project, but I couldn’t find the white (it was before the Big Craft Sort).

Instead, concentrate on the main image. For this, I masked the elephant, then spattered paint all over the background. I did this at a Crafty Friday event and, again, took inspiration from one of my customers. Kate made a splattered background around her elephant image and we decided it looked like the elephant had done it with a paintbrush. So, between us, we carefully drew in a paintbrush - and I loved the effect so much that I just had to make my own version.

Read More »

How fun is this? Ignore the copper embossing; while I love the new copper embossing powder, it really doesn't work on this project, but I couldn’t find the white (it was before the Big Craft Sort).

Instead, concentrate on the main image. For this, I masked the elephant, then spattered paint all over the background. I did this at a Crafty Friday event and, again, took inspiration from one of my customers. Kate made a splattered background around her elephant image and we decided it looked like the elephant had done it with a paintbrush. So, between us, we carefully drew in a paintbrush - and I loved the effect so much that I just had to make my own version.