Tuesday, 28 June 2011

Nautical news

Sorry for the lack of blog posts, I’m having a really busy week, trying to prepare for the big Fabulous Places event at the Roundhouse in Derby at the weekend, while also getting ready for Christmas in July the weekend after. Please bear with me over the next few days as I won’t be around much to post to my blog.

But, to keep you going for a while, here’s an idea which I saw on the great Shelli Gardner’s blog. Shelli, as many of you know, is the co-founder and CEO of Stampin’ Up!® If Shelli and her sister hadn’t had the idea to set up a rubber stamping home party business from their living room 20-odd years ago, you wouldn’t be reading this blog today! Here’s a link to Shelli’s blog post which inspired today’s card. I just love the idea of using Newsprint (one of my favourite Designer Series Papers) for sails.

All you do is stamp once on Very Vanilla cardstock and then again on the Newsprint. Cut out the sails and stick them on top. It’s called “paper piecing” – and if you ever wondered if that was a complicated technique, now you know it’s not!

I kept the colours simple – just Sahara Sand (love that colour!) with Basic Black and a bit of linen thread and a button.

Stamps: Sail Away
Cardstock: Basic Black, Sahara Sand, Very Vanilla
Paper: Newsprint
Ink: Basic Black
Accessories: Linen Thread, Neutrals Buttons

All products by Stampin’ Up!®            
Read More »
Sorry for the lack of blog posts, I’m having a really busy week, trying to prepare for the big Fabulous Places event at the Roundhouse in Derby at the weekend, while also getting ready for Christmas in July the weekend after. Please bear with me over the next few days as I won’t be around much to post to my blog.

But, to keep you going for a while, here’s an idea which I saw on the great Shelli Gardner’s blog. Shelli, as many of you know, is the co-founder and CEO of Stampin’ Up!® If Shelli and her sister hadn’t had the idea to set up a rubber stamping home party business from their living room 20-odd years ago, you wouldn’t be reading this blog today! Here’s a link to Shelli’s blog post which inspired today’s card. I just love the idea of using Newsprint (one of my favourite Designer Series Papers) for sails.

All you do is stamp once on Very Vanilla cardstock and then again on the Newsprint. Cut out the sails and stick them on top. It’s called “paper piecing” – and if you ever wondered if that was a complicated technique, now you know it’s not!

I kept the colours simple – just Sahara Sand (love that colour!) with Basic Black and a bit of linen thread and a button.

Stamps: Sail Away
Cardstock: Basic Black, Sahara Sand, Very Vanilla
Paper: Newsprint
Ink: Basic Black
Accessories: Linen Thread, Neutrals Buttons

All products by Stampin’ Up!®            

Friday, 24 June 2011

Sail Away

Have I introduced you to this sailing boat yet? I don’t think so, and yet I’ve been using it quite a lot recently. It’s from the very back of the Mini Catalogue, where you’ll find some really nice individual stamps – perfect for presents, for those getting started who don’t want to splash out on everything immediately and, of course, for those who just like the images.

I’m a sucker for all things nautical – before I became a Stampin’ Up!® demonstrator I had an entire box devoted to seaside images, lighthouses, seagulls etc – so couldn’t resist this boat stamp.

This is a really simple card – just a bit of corrugating, some linen thread and a splash of red. I coloured the image – just the sails and the sea – with Watercolour Wonder™ crayons and a blender pen.

Stamps: Sail Away
Cardstock: Tempting Turquoise, Night of Navy, Real Red, Basic Grey, Whisper White
Ink: Basic Black
Accessories: Paper Crimper, Linen Thread, Watercolour Wonder™ crayons, blender pen

All products by Stampin’ Up!®
Read More »
Have I introduced you to this sailing boat yet? I don’t think so, and yet I’ve been using it quite a lot recently. It’s from the very back of the Mini Catalogue, where you’ll find some really nice individual stamps – perfect for presents, for those getting started who don’t want to splash out on everything immediately and, of course, for those who just like the images.

I’m a sucker for all things nautical – before I became a Stampin’ Up!® demonstrator I had an entire box devoted to seaside images, lighthouses, seagulls etc – so couldn’t resist this boat stamp.

This is a really simple card – just a bit of corrugating, some linen thread and a splash of red. I coloured the image – just the sails and the sea – with Watercolour Wonder™ crayons and a blender pen.

Stamps: Sail Away
Cardstock: Tempting Turquoise, Night of Navy, Real Red, Basic Grey, Whisper White
Ink: Basic Black
Accessories: Paper Crimper, Linen Thread, Watercolour Wonder™ crayons, blender pen

All products by Stampin’ Up!®

Wednesday, 22 June 2011

Mother of Pearl MkII


Ooh, just found this in my files – something I made a while ago and forgot to post. It showcases the Mother of Pearl technique, which you can read about here so I won’t go over it again.

After stamping the tree, I punched some tiny flowers with the Itty Bitty Punches and added some ever-so-tiny pearls. I stamped “just for you” from the Just Believe stamp set – see? This tree doesn’t have to be for a sympathy card. In fact, I really like this tree for lots of occasions.

(By the way, that isn't a fancy corner on the right of the card front - it's just my black cloth which I use as a backdrop!)

Stamps: Hopeful Thoughts, Just Believe
Cardstock: Pink Pirouette, Basic Black, Whisper White, Melon Mambo
Ink: Black StazOn®
Accessories: Wide striped ribbon – Basic Black, Frost White Shimmer Paint, Itty Bitty Punches, Basic Pearls

All products by Stampin’ Up!®
Read More »
Ooh, just found this in my files – something I made a while ago and forgot to post. It showcases the Mother of Pearl technique, which you can read about here so I won’t go over it again.

After stamping the tree, I punched some tiny flowers with the Itty Bitty Punches and added some ever-so-tiny pearls. I stamped “just for you” from the Just Believe stamp set – see? This tree doesn’t have to be for a sympathy card. In fact, I really like this tree for lots of occasions.

(By the way, that isn't a fancy corner on the right of the card front - it's just my black cloth which I use as a backdrop!)

Stamps: Hopeful Thoughts, Just Believe
Cardstock: Pink Pirouette, Basic Black, Whisper White, Melon Mambo
Ink: Black StazOn®
Accessories: Wide striped ribbon – Basic Black, Frost White Shimmer Paint, Itty Bitty Punches, Basic Pearls

All products by Stampin’ Up!®
Monday, 20 June 2011

Peeping monsters


When I saw this Designer Series Paper form the Celebrations collection, I just had to punch holes in it and make the monsters peep through!  Aren’t they great? And the cheat-y part is that you can stamp the monsters on individual scraps of Whisper White and position them behind the holes – you don’t have to get it right every time, thankfully!  I still can’t use this stamp set without chuckling to myself, it’s such a fun set.

Stamps: Make A Monster, Party This Way
Cardstock: Real Red, Old Olive, Whisper White
Paper: Celebrations
Ink: Basic Black, Old Olive
Accessories: Markers - Bashful Blue, Old Olive, Real Red; Circle punches – 1”, 1 ¼”, 1 3/8”

All products by Stampin’ Up!®            
Read More »

When I saw this Designer Series Paper form the Celebrations collection, I just had to punch holes in it and make the monsters peep through!  Aren’t they great? And the cheat-y part is that you can stamp the monsters on individual scraps of Whisper White and position them behind the holes – you don’t have to get it right every time, thankfully!  I still can’t use this stamp set without chuckling to myself, it’s such a fun set.

Stamps: Make A Monster, Party This Way
Cardstock: Real Red, Old Olive, Whisper White
Paper: Celebrations
Ink: Basic Black, Old Olive
Accessories: Markers - Bashful Blue, Old Olive, Real Red; Circle punches – 1”, 1 ¼”, 1 3/8”

All products by Stampin’ Up!®            

Sunday, 19 June 2011

Such a great team!

My team have been working very hard lately – so hard that, in fact, two of them promoted! It’s a complicated system but the short version is that, through sales and recruiting, we demonstrators have the opportunity to promote to different levels, and receive recognition and rewards from Stampin’ Up!

I was delighted to be able to congratulate Jacqui and Tracy recently for their efforts – and can’t wait to see them at our next team meeting to give them their team reward, too. Tracy will be getting a special bead keyring, while Jacqui will be getting an extra bead to add to the keyring she earned previously.

Meanwhile, this is the card I sent them both, again using my favourite set of the moment, Nature Walk.

I inked the stamp in Pear Pizzazz, then cleaned off the flower with a cotton bud so that I could ink it up with a Bravo Burgundy marker.

Stamps: Nature Walk, Something to Celebrate (hostess)
Cardstock: So Saffron, Bravo Burgundy, Pear Pizzazz
Ink: So Saffron, Pear Pizzazz, Bravo Burgundy
Accessories: Modern Label punch, taffeta ribbon – Old Olive, Stampin’ Pastels

All products by Stampin’ Up!®
Read More »
My team have been working very hard lately – so hard that, in fact, two of them promoted! It’s a complicated system but the short version is that, through sales and recruiting, we demonstrators have the opportunity to promote to different levels, and receive recognition and rewards from Stampin’ Up!

I was delighted to be able to congratulate Jacqui and Tracy recently for their efforts – and can’t wait to see them at our next team meeting to give them their team reward, too. Tracy will be getting a special bead keyring, while Jacqui will be getting an extra bead to add to the keyring she earned previously.

Meanwhile, this is the card I sent them both, again using my favourite set of the moment, Nature Walk.

I inked the stamp in Pear Pizzazz, then cleaned off the flower with a cotton bud so that I could ink it up with a Bravo Burgundy marker.

Stamps: Nature Walk, Something to Celebrate (hostess)
Cardstock: So Saffron, Bravo Burgundy, Pear Pizzazz
Ink: So Saffron, Pear Pizzazz, Bravo Burgundy
Accessories: Modern Label punch, taffeta ribbon – Old Olive, Stampin’ Pastels

All products by Stampin’ Up!®

Saturday, 18 June 2011

Appreciating Eileen

Here’s the second card I sent off to Germany for Demo Support Appreciation Day, this time for the lovely and super-helpful Eileen.

Again I used the Nature Walk stamp set, my favourite from the Mini. I inked the stamp with markers. Let’s pretend I used Early Espresso and Cherry Cobbler, as that’s what it looks like, although I have a horrible feeling it was Real Red on a dirty stamp!

The strip of Designer Series Paper is Elegant Soiree, which is one of the most popular collections in the main catalogue. I topped it with a strip of Baja Breeze seam-binding ribbon and my very last piece of Early Espresso taffeta.

Stamps: Nature Walk, Tiny Tags
Cardstock:  Baja Breeze, Early Espresso, Very Vanilla, Cherry Cobbler
Paper: Elegant Soiree
Ink: Baja Breeze, Cherry Cobbler, plus markers
Accessories: Word Window Punch, Modern Label Punch, Scallop Edge Punch, Seam Binding Ribbon – Baja Breeze, 1/8” taffeta ribbon – Early Espresso

All products by Stampin’ Up!®            
Read More »
Here’s the second card I sent off to Germany for Demo Support Appreciation Day, this time for the lovely and super-helpful Eileen.

Again I used the Nature Walk stamp set, my favourite from the Mini. I inked the stamp with markers. Let’s pretend I used Early Espresso and Cherry Cobbler, as that’s what it looks like, although I have a horrible feeling it was Real Red on a dirty stamp!

The strip of Designer Series Paper is Elegant Soiree, which is one of the most popular collections in the main catalogue. I topped it with a strip of Baja Breeze seam-binding ribbon and my very last piece of Early Espresso taffeta.

Stamps: Nature Walk, Tiny Tags
Cardstock:  Baja Breeze, Early Espresso, Very Vanilla, Cherry Cobbler
Paper: Elegant Soiree
Ink: Baja Breeze, Cherry Cobbler, plus markers
Accessories: Word Window Punch, Modern Label Punch, Scallop Edge Punch, Seam Binding Ribbon – Baja Breeze, 1/8” taffeta ribbon – Early Espresso

All products by Stampin’ Up!®            

Thursday, 16 June 2011

Egging Chris on...

June 9th has been unofficially designated Demo Support Appreciation Day, by some of the demonstrators over on In Love With Stamping.

As demonstrators, we all help each other out and our upline (the person you sign up under) is your first port of call for any advice and questions. But there are always times when you upline isn’t available, or the question requires an answer direct from Stampin’ Up! – and, of course, some of us signed up too early in SU’s UK career to have an upline... and this is where Demonstrator Support comes in.

The US demo support team is huge – we have just two people, Chris and Eileen, which is lovely as we really get to know them. They couldn’t be more helpful and friendly – so thanking them once a year with a card is the least we can do!

This one I made for Chris. I tried to keep it masculine but couldn’t resist some ribbon – it looked too plain without it! I sincerely hope this card has reached Germany by now as I know that Chris can’t resist stalking our blogs on occasion.

The eggs are stamped in Early Espresso and then coloured very carefully with a blender pen and Baja Breeze ink. In fact, I had to “dot” the ink on (there’s a fancy word for that, isn’t there?) to stop it smudging.

Stamps: Nature Walk, Tiny Tags
Cardstock: Crumb Cake, Baja Breeze, Early Espresso, Very Vanilla
Paper: Elegant Soiree
Ink: Early Espresso, Baja Breeze
Accessories: Jewellery Tag, Scallop Edge Punch, Seam Binding Ribbon – Baja Breeze

All products by Stampin’ Up!®            
Read More »
June 9th has been unofficially designated Demo Support Appreciation Day, by some of the demonstrators over on In Love With Stamping.

As demonstrators, we all help each other out and our upline (the person you sign up under) is your first port of call for any advice and questions. But there are always times when you upline isn’t available, or the question requires an answer direct from Stampin’ Up! – and, of course, some of us signed up too early in SU’s UK career to have an upline... and this is where Demonstrator Support comes in.

The US demo support team is huge – we have just two people, Chris and Eileen, which is lovely as we really get to know them. They couldn’t be more helpful and friendly – so thanking them once a year with a card is the least we can do!

This one I made for Chris. I tried to keep it masculine but couldn’t resist some ribbon – it looked too plain without it! I sincerely hope this card has reached Germany by now as I know that Chris can’t resist stalking our blogs on occasion.

The eggs are stamped in Early Espresso and then coloured very carefully with a blender pen and Baja Breeze ink. In fact, I had to “dot” the ink on (there’s a fancy word for that, isn’t there?) to stop it smudging.

Stamps: Nature Walk, Tiny Tags
Cardstock: Crumb Cake, Baja Breeze, Early Espresso, Very Vanilla
Paper: Elegant Soiree
Ink: Early Espresso, Baja Breeze
Accessories: Jewellery Tag, Scallop Edge Punch, Seam Binding Ribbon – Baja Breeze

All products by Stampin’ Up!®            

Monday, 13 June 2011

Oops, forgot the title!

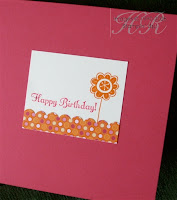
Something a bit different from my usual creations, this card uses the bright and zingy Sweet & Sour Speciality Designer Series Paper. What’s so special about it? Well, you can’t see from the photo but one side of each sheet has a glossy finish. Not all over, that would be too much. But on this piece, for instance, some of the circles are glossy and raised. My favourite sheet is the one that’s in the bottom centre in the catalogue (p88) – the whole of that large swirl is glossy. I don’t have much of that though as I only have a tiny piece leftover from the paper share and making my paper sampler.

The colours are what give the paper its Sweet & Sour name. I probably would never have put Pumpkin Pie with Rose Red without the influence of this paper.

The stamp set is Hello Again, which is such a bargain – and great for beginner stampers. I stamped the flowers in a row in Rose Red and then again on a piece of scrap Whisper White in Pumpkin Pie. I cut out the centres and popped them up.

This is quite a big card (14.5cm square) so I decorated the inside, too!

Stamps: Hello Again, Something to Celebrate (hostess)
Cardstock: Rose Red, Pumpkin Pie, Whisper White
Paper: Sweet & Sour Speciality
Ink: Rose Red, Pumpkin Pie
Accessories: Taffeta Ribbon - Pumpkin Pie, Scallop Edge Punch

All products by Stampin’ Up!®
Read More »
Something a bit different from my usual creations, this card uses the bright and zingy Sweet & Sour Speciality Designer Series Paper. What’s so special about it? Well, you can’t see from the photo but one side of each sheet has a glossy finish. Not all over, that would be too much. But on this piece, for instance, some of the circles are glossy and raised. My favourite sheet is the one that’s in the bottom centre in the catalogue (p88) – the whole of that large swirl is glossy. I don’t have much of that though as I only have a tiny piece leftover from the paper share and making my paper sampler.

The colours are what give the paper its Sweet & Sour name. I probably would never have put Pumpkin Pie with Rose Red without the influence of this paper.

The stamp set is Hello Again, which is such a bargain – and great for beginner stampers. I stamped the flowers in a row in Rose Red and then again on a piece of scrap Whisper White in Pumpkin Pie. I cut out the centres and popped them up.

This is quite a big card (14.5cm square) so I decorated the inside, too!

Stamps: Hello Again, Something to Celebrate (hostess)
Cardstock: Rose Red, Pumpkin Pie, Whisper White
Paper: Sweet & Sour Speciality
Ink: Rose Red, Pumpkin Pie
Accessories: Taffeta Ribbon - Pumpkin Pie, Scallop Edge Punch

All products by Stampin’ Up!®

Saturday, 11 June 2011

Oh what a beautiful morning...


Somehow this card feels just right for such a glorious morning. I made a few of these to welcome some new recruits to my Stampin’ Up!® team. My team have been very busy in May, recruiting more demonstrators to our little family and I’m looking forward to meeting some of the new ladies at our forthcoming team meeting.

If you’re interested in joining our team as a demonstrator, please do get in touch – you are welcome to attend one of our meetings to find out more information before you decide whether to sign up or not. There will be no pressure – just lots of enthusiastic demonstrators happy to share their experiences with you. If you’d like to find out more, or come along to our next meeting, please email me.

Meanwhile, back to the card, which is made with Nature Walk, my most favourite set from the new Mini catalogue. I began by repeatedly stamping the foliage stamp in Pear Pizzazz – I stamped a few times without reinking, to get the paler images; this is called “stamping off”. Next I stamped the bee in Bravo Burgundy, although the photo makes it look like Cajun Craze, which would have worked just as well.

As I couldn’t lay my hands on my Distressing Kit (MUST have a sort-out!), I sponged chalk around the edges of the Very Vanilla panel in various colours; can’t actually remember which ones I used, sorry.  This was mounted on a Bravo Burgundy panel.

The “Welcome” comes from Something to Celebrate – I inked just the “welcome” part using a Bravo Burgundy marker. It was a bit tricky, as there’s a comma attached to the E but I mastered it after a few attempts.

The ribbon is Old Olive but, because it’s that lovely taffeta, it’s a little paler than Old Olive, so goes perfectly well with Pear Pizzazz. Pear Pizzazz ribbon is available, too, but I don’t have any unfortunately.

Finally, I stamped the sprig again in So Saffron on the edge of the card base.

Stamps: Nature Walk, Something to Celebrate (hostess)
Cardstock: So Saffron, Bravo Burgundy, Pear Pizzazz
Ink: So Saffron, Pear Pizzazz, Bravo Burgundy
Accessories: Modern Label punch, taffeta ribbon – Old Olive, Stampin’ Pastels

All products by Stampin’ Up!®
Read More »
Somehow this card feels just right for such a glorious morning. I made a few of these to welcome some new recruits to my Stampin’ Up!® team. My team have been very busy in May, recruiting more demonstrators to our little family and I’m looking forward to meeting some of the new ladies at our forthcoming team meeting.

If you’re interested in joining our team as a demonstrator, please do get in touch – you are welcome to attend one of our meetings to find out more information before you decide whether to sign up or not. There will be no pressure – just lots of enthusiastic demonstrators happy to share their experiences with you. If you’d like to find out more, or come along to our next meeting, please email me.

Meanwhile, back to the card, which is made with Nature Walk, my most favourite set from the new Mini catalogue. I began by repeatedly stamping the foliage stamp in Pear Pizzazz – I stamped a few times without reinking, to get the paler images; this is called “stamping off”. Next I stamped the bee in Bravo Burgundy, although the photo makes it look like Cajun Craze, which would have worked just as well.

As I couldn’t lay my hands on my Distressing Kit (MUST have a sort-out!), I sponged chalk around the edges of the Very Vanilla panel in various colours; can’t actually remember which ones I used, sorry.  This was mounted on a Bravo Burgundy panel.

The “Welcome” comes from Something to Celebrate – I inked just the “welcome” part using a Bravo Burgundy marker. It was a bit tricky, as there’s a comma attached to the E but I mastered it after a few attempts.

The ribbon is Old Olive but, because it’s that lovely taffeta, it’s a little paler than Old Olive, so goes perfectly well with Pear Pizzazz. Pear Pizzazz ribbon is available, too, but I don’t have any unfortunately.

Finally, I stamped the sprig again in So Saffron on the edge of the card base.

Stamps: Nature Walk, Something to Celebrate (hostess)
Cardstock: So Saffron, Bravo Burgundy, Pear Pizzazz
Ink: So Saffron, Pear Pizzazz, Bravo Burgundy
Accessories: Modern Label punch, taffeta ribbon – Old Olive, Stampin’ Pastels

All products by Stampin’ Up!®

Thursday, 9 June 2011

Keeping it simple


You may have noticed this but rubber stamping can be a little addictive. It doesn’t take long before you accumulate lots of different products – stamps, cardstock, patterned papers, ribbon, embellishments. It’s no wonder it can seem a daunting hobby to some people – they think you have to spend a fortune.

Well of course you don’t. The beauty of rubber stamping is that you can still make beautiful projects with just a few products, and I recently designed a workshop just for new crafters. It illustrates how you can get all the basics for around £45, without being too minimalist.

This is one of the samples I made with this limited supply kit – I used the Pocket Silhouettes stamp set, which is hugely popular with my customers. I also used the Getting Started cardstock pack, which is designed with new crafters in mind. It’s perfect because it features a wide range of cardstock colours – a black, brown, red, green, yellow, a couple of blues etc – as well as Whisper White, so you only have to buy one pack of cardstock to get going.  I added a roll of ribbon because we all need something pretty in our lives.

Stamps: Pocket Silhouettes
Cardstock: Getting Started assortment (used here - Whisper White, Certainly Celery, Marina Mist, Daffodil Delight)
Ink: Marina Mist, Daffodil Delight
Accessories: 1/8” Taffeta ribbon – Marina Mist, C6 envelopes

All products by Stampin’ Up!®
Read More »
You may have noticed this but rubber stamping can be a little addictive. It doesn’t take long before you accumulate lots of different products – stamps, cardstock, patterned papers, ribbon, embellishments. It’s no wonder it can seem a daunting hobby to some people – they think you have to spend a fortune.

Well of course you don’t. The beauty of rubber stamping is that you can still make beautiful projects with just a few products, and I recently designed a workshop just for new crafters. It illustrates how you can get all the basics for around £45, without being too minimalist.

This is one of the samples I made with this limited supply kit – I used the Pocket Silhouettes stamp set, which is hugely popular with my customers. I also used the Getting Started cardstock pack, which is designed with new crafters in mind. It’s perfect because it features a wide range of cardstock colours – a black, brown, red, green, yellow, a couple of blues etc – as well as Whisper White, so you only have to buy one pack of cardstock to get going.  I added a roll of ribbon because we all need something pretty in our lives.

Stamps: Pocket Silhouettes
Cardstock: Getting Started assortment (used here - Whisper White, Certainly Celery, Marina Mist, Daffodil Delight)
Ink: Marina Mist, Daffodil Delight
Accessories: 1/8” Taffeta ribbon – Marina Mist, C6 envelopes

All products by Stampin’ Up!®

Tuesday, 7 June 2011

More fun with the Top Note Die

Top Note Die idea no. 5. I don’t know if I dare admit how many ideas I’m aiming for... no, I’ll keep quiet until I know I can reach my target!

This is simply a background panel for a card... although if you look carefully you’ll see it’s so much more than that because the raised flowers are paler than the background. I borrowed this idea from Monica, another UK demonstrator; here’s how you do it:

1. First create a Top Note from cardstock of your choice – choose one that you have the ink pad to match. I used Sahara Sand.

2. Take your Elegant Bouquet embossing folder, the matching ink pad and a brayer. Sorry folks, you’ll have to dust off the brayer for this one! Now brayer all over one side of the inside of the embossing folder – make sure it’s the side with the flowers indented, not raised.

3. Sandwich your Top Note in the folder and run through the Big Shot. The result should be raised flowers which are unlinked, with a darker background. Experiment with different colours to see what other effects you can create.

Now you’ll notice that I’ve slipped in the Strength & Hope stamp set which I have just taken delivery of and am having fun playing with. It’s not proved very popular with my customers but it’s very pretty, really, and it’s for sale for a very good cause. My Strength & Hope fundraiser is being rescheduled, but in light of the reaction to the stamp set, I will be offering an alternative. However, maybe you will all be won over by then!

I inked the butterfly using the rocking and rolling technique. This means I inked it with Baja Breeze ink and then rolled the stamp around the edges on the Soft Suede ink pad to ink up the edges. I also inked just the antennae of the butterfly in Soft Suede and stamped it directly onto the Top Note, then stuck the cut-out butterfly on top. I used SNAIL in the centre of the butterfly so that it was flat to the card and Dimensionals under each wing to raise them up.

Stamps: Something to Celebrate (hostess)
Cardstock: Baja Breeze, Sahara Sand, Soft Suede, Very Vanilla
Paper: Elegant Soiree
Ink: Soft Suede, Baja Breeze, Sahara Sand
Accessories: Top Note Die, Elegant Bouquet embossing folder, Modern Label Punch, Word Window Punch, Basic Pearls, Seam Binding Ribbon – Crumb Cake

All products by Stampin’ Up!®
Read More »
Top Note Die idea no. 5. I don’t know if I dare admit how many ideas I’m aiming for... no, I’ll keep quiet until I know I can reach my target!

This is simply a background panel for a card... although if you look carefully you’ll see it’s so much more than that because the raised flowers are paler than the background. I borrowed this idea from Monica, another UK demonstrator; here’s how you do it:

1. First create a Top Note from cardstock of your choice – choose one that you have the ink pad to match. I used Sahara Sand.

2. Take your Elegant Bouquet embossing folder, the matching ink pad and a brayer. Sorry folks, you’ll have to dust off the brayer for this one! Now brayer all over one side of the inside of the embossing folder – make sure it’s the side with the flowers indented, not raised.

3. Sandwich your Top Note in the folder and run through the Big Shot. The result should be raised flowers which are unlinked, with a darker background. Experiment with different colours to see what other effects you can create.

Now you’ll notice that I’ve slipped in the Strength & Hope stamp set which I have just taken delivery of and am having fun playing with. It’s not proved very popular with my customers but it’s very pretty, really, and it’s for sale for a very good cause. My Strength & Hope fundraiser is being rescheduled, but in light of the reaction to the stamp set, I will be offering an alternative. However, maybe you will all be won over by then!

I inked the butterfly using the rocking and rolling technique. This means I inked it with Baja Breeze ink and then rolled the stamp around the edges on the Soft Suede ink pad to ink up the edges. I also inked just the antennae of the butterfly in Soft Suede and stamped it directly onto the Top Note, then stuck the cut-out butterfly on top. I used SNAIL in the centre of the butterfly so that it was flat to the card and Dimensionals under each wing to raise them up.

Stamps: Something to Celebrate (hostess)
Cardstock: Baja Breeze, Sahara Sand, Soft Suede, Very Vanilla
Paper: Elegant Soiree
Ink: Soft Suede, Baja Breeze, Sahara Sand
Accessories: Top Note Die, Elegant Bouquet embossing folder, Modern Label Punch, Word Window Punch, Basic Pearls, Seam Binding Ribbon – Crumb Cake

All products by Stampin’ Up!®

Saturday, 4 June 2011

Sandwich box


Top Note Die idea no. 4... to make this cute little “sandwich” box. This box reminds me a little of an ice cream wafer sandwich – why can’t you get those any more?

I saw this box on the internet somewhere and guessed the dimensions. If you invented the box, please do comment and I will, of course, give credit where it’s due!

You’ll need two Top Notes and a piece of cardstock just smaller than A5, which is great because you can get the whole lot out of one sheet of A4!

I have measurements in metric and imperial so have done you a rough template. Your piece of cardstock needs to measure 20.5cm x 14cm (8”x5½”). Cut along the solid lines and score along the dotted lines.


I find it easier to start by scoring at 2.5cm (1”) from each edge. This is more accurate than starting at the left and working your way across.

Fold in the flaps to create a lid and then repeat on the opposite side. I’m not very good at explaining this but all will become clear. Finally you simply “sandwich” the box to the Top Notes so that when you lift the lid, the box opens.

Stamps: Just Believe
Cardstock: Pink Pirouette
Ink: Basic Black, Melon Mambo
Accessories: Top Note Die, Modern Label Punch, Basic Pearls, Itty Bitty Punches

All products by Stampin’ Up!®
Read More »
Top Note Die idea no. 4... to make this cute little “sandwich” box. This box reminds me a little of an ice cream wafer sandwich – why can’t you get those any more?

I saw this box on the internet somewhere and guessed the dimensions. If you invented the box, please do comment and I will, of course, give credit where it’s due!

You’ll need two Top Notes and a piece of cardstock just smaller than A5, which is great because you can get the whole lot out of one sheet of A4!

I have measurements in metric and imperial so have done you a rough template. Your piece of cardstock needs to measure 20.5cm x 14cm (8”x5½”). Cut along the solid lines and score along the dotted lines.


I find it easier to start by scoring at 2.5cm (1”) from each edge. This is more accurate than starting at the left and working your way across.

Fold in the flaps to create a lid and then repeat on the opposite side. I’m not very good at explaining this but all will become clear. Finally you simply “sandwich” the box to the Top Notes so that when you lift the lid, the box opens.

Stamps: Just Believe
Cardstock: Pink Pirouette
Ink: Basic Black, Melon Mambo
Accessories: Top Note Die, Modern Label Punch, Basic Pearls, Itty Bitty Punches

All products by Stampin’ Up!®

Friday, 3 June 2011

It's good news week!

Have I got news for you! There’s a fabulous new offer from Stampin’ Up!® for June and July which will make hosting a workshop even more rewarding!

As you know, hostesses get great benefits for holding a workshop. Freebies start flooding in with a £150 workshop and go up and up as the party total rises. But in June and July, the rewards are even greater. If you hostess a £250 party, you’ll receive £20 EXTRA freebies.  This is what you’ll get:

  1. A level 1 hostess set chosen from the main Idea Book & Catalogue or the Mini Catalogue
  2. £25 of free merchandise of your choice
  3. an EXTRA £20 of free merchandise of your choice ... so £45 in total!
This is on top of the usual free copy of the Idea Book & Catalogue (given to you before the event, so you can show it to your friends) and a little hand-stamped gift from me.

Holding a workshop is great fun and couldn’t be easier. You find the guests and provide drinks and nibbles (nothing elaborate is required – it distracts from the fun of crafting!) and I’ll do the rest.

So why not book your party now and get together with your friends before everyone clears off on their summer holidays? Please email me to set a date.


Read More » Have I got news for you! There’s a fabulous new offer from Stampin’ Up!® for June and July which will make hosting a workshop even more rewarding!

As you know, hostesses get great benefits for holding a workshop. Freebies start flooding in with a £150 workshop and go up and up as the party total rises. But in June and July, the rewards are even greater. If you hostess a £250 party, you’ll receive £20 EXTRA freebies.  This is what you’ll get:

  1. A level 1 hostess set chosen from the main Idea Book & Catalogue or the Mini Catalogue
  2. £25 of free merchandise of your choice
  3. an EXTRA £20 of free merchandise of your choice ... so £45 in total!
This is on top of the usual free copy of the Idea Book & Catalogue (given to you before the event, so you can show it to your friends) and a little hand-stamped gift from me.

Holding a workshop is great fun and couldn’t be easier. You find the guests and provide drinks and nibbles (nothing elaborate is required – it distracts from the fun of crafting!) and I’ll do the rest.

So why not book your party now and get together with your friends before everyone clears off on their summer holidays? Please email me to set a date.


Thursday, 2 June 2011

Using those paper scraps

Another Top Note Die idea to add to the collection... and a brilliant way to use up those little scraps of Designer Series Paper. I only have scraps of this Blueberry Crisp paper as it’s leftover from my paper share which I used to make a DSP sampler. It was only when I made up the sampler that I realised how beautiful this paper is!

First you need a piece of scrap card, about A6 (a quarter of an A4 sheet) will do. I used the backing from a pack of Designer Series Paper, no need to waste perfectly good cardstock! Cover the piece thinly with Tombow adhesive and apply the strips of Designer Series Paper to cover it completely. No need to overlap, just but them up right against each other.

Now you need to run it through the Big Shot with the Top Note Die.  NB: Somebody left me a comment the other day expressing concern about putting Tombow adhesive through the Big Shot, in case it spills out the sides and damages the die. I have to say I have never had any problems because I always spread the Tombow very thinly (so there is no excess to spill out) and allow it to dry thoroughly first.  There should be no problems if you take these precautions but, if you’re still not convinced, use SNAIL or Sticky Strip instead. I prefer Tombow because it's the most economical way to get 100% coverage.

The flower is another project I saw on the internet and it’s made up of several punched-out flowers. I used the Fancy Flower punch, the Five-Petal Flower punch and the largest flower from the Boho Blossoms Punch; three of each punched in Crumb Cake cardstock.  I punched a hole through the centre and added a rhinestone brad to hold them all together. I arranged the petals so they were “staggered” and then spritzed the whole lot with water before beginning to scrunch them all up. Once I was happy with how the flower looked (you may need to add more water as you lift the top petals), I left it to dry. Finally, I added a pearl on top of the rhinestone brad, which was a little extravagant by my standards!

The ribbon is Seam Binding, ruffled to create texture and the Happy Birthday banner is curled and stuck down to remain curled for dimension. Frankly, this card is never going to fit in an envelope, so I may as well have some fun with it!

Stamps: Something to Celebrate (hostess)
Cardstock: Crumb Cake, Very Vanilla
Paper: Blueberry Crisp
Ink: Not Quite Navy
Accessories: Top Note Die, Fancy Flower Punch, Five Petal Flower punch, Boho Blossoms Punch, rhinestone brads, basic pearls, Seam-binding ribbon – Crumb Cake

All products by Stampin’ Up!®
Read More »
Another Top Note Die idea to add to the collection... and a brilliant way to use up those little scraps of Designer Series Paper. I only have scraps of this Blueberry Crisp paper as it’s leftover from my paper share which I used to make a DSP sampler. It was only when I made up the sampler that I realised how beautiful this paper is!

First you need a piece of scrap card, about A6 (a quarter of an A4 sheet) will do. I used the backing from a pack of Designer Series Paper, no need to waste perfectly good cardstock! Cover the piece thinly with Tombow adhesive and apply the strips of Designer Series Paper to cover it completely. No need to overlap, just but them up right against each other.

Now you need to run it through the Big Shot with the Top Note Die.  NB: Somebody left me a comment the other day expressing concern about putting Tombow adhesive through the Big Shot, in case it spills out the sides and damages the die. I have to say I have never had any problems because I always spread the Tombow very thinly (so there is no excess to spill out) and allow it to dry thoroughly first.  There should be no problems if you take these precautions but, if you’re still not convinced, use SNAIL or Sticky Strip instead. I prefer Tombow because it's the most economical way to get 100% coverage.

The flower is another project I saw on the internet and it’s made up of several punched-out flowers. I used the Fancy Flower punch, the Five-Petal Flower punch and the largest flower from the Boho Blossoms Punch; three of each punched in Crumb Cake cardstock.  I punched a hole through the centre and added a rhinestone brad to hold them all together. I arranged the petals so they were “staggered” and then spritzed the whole lot with water before beginning to scrunch them all up. Once I was happy with how the flower looked (you may need to add more water as you lift the top petals), I left it to dry. Finally, I added a pearl on top of the rhinestone brad, which was a little extravagant by my standards!

The ribbon is Seam Binding, ruffled to create texture and the Happy Birthday banner is curled and stuck down to remain curled for dimension. Frankly, this card is never going to fit in an envelope, so I may as well have some fun with it!

Stamps: Something to Celebrate (hostess)
Cardstock: Crumb Cake, Very Vanilla
Paper: Blueberry Crisp
Ink: Not Quite Navy
Accessories: Top Note Die, Fancy Flower Punch, Five Petal Flower punch, Boho Blossoms Punch, rhinestone brads, basic pearls, Seam-binding ribbon – Crumb Cake

All products by Stampin’ Up!®